App Management
Overview
In the App Management section of the Akku dashboard, administrators can integrate third-party applications, manage single sign-on (SSO), automate provisioning, and enforce granular access controls across your organization.
In this section of the user guide, we will cover the following:
- Onboarding applications from the App Store
- Managing My Apps
- Configuring SSO
- Testing functionality
Watch Video
Navigation Path

My Apps
You will see all the currently integrated apps, along with the following:
Search bar: Filter apps by name
Configure button: Access settings like SSO and Provisioning for each app
Active/Inactive Indicators: Easily identify if SSO or Provisioning are enabled for each app
Examples: Easily identify if SSO or Provisioning are enabled for each app
Google – SSO | Provisioning | Inactive
Jira – SSO | Provisioning | Active
Blackboard, Canvas, D2L – Setup Available
You can click on the Configure button for an app to set up SSO or Provisioning for that app.
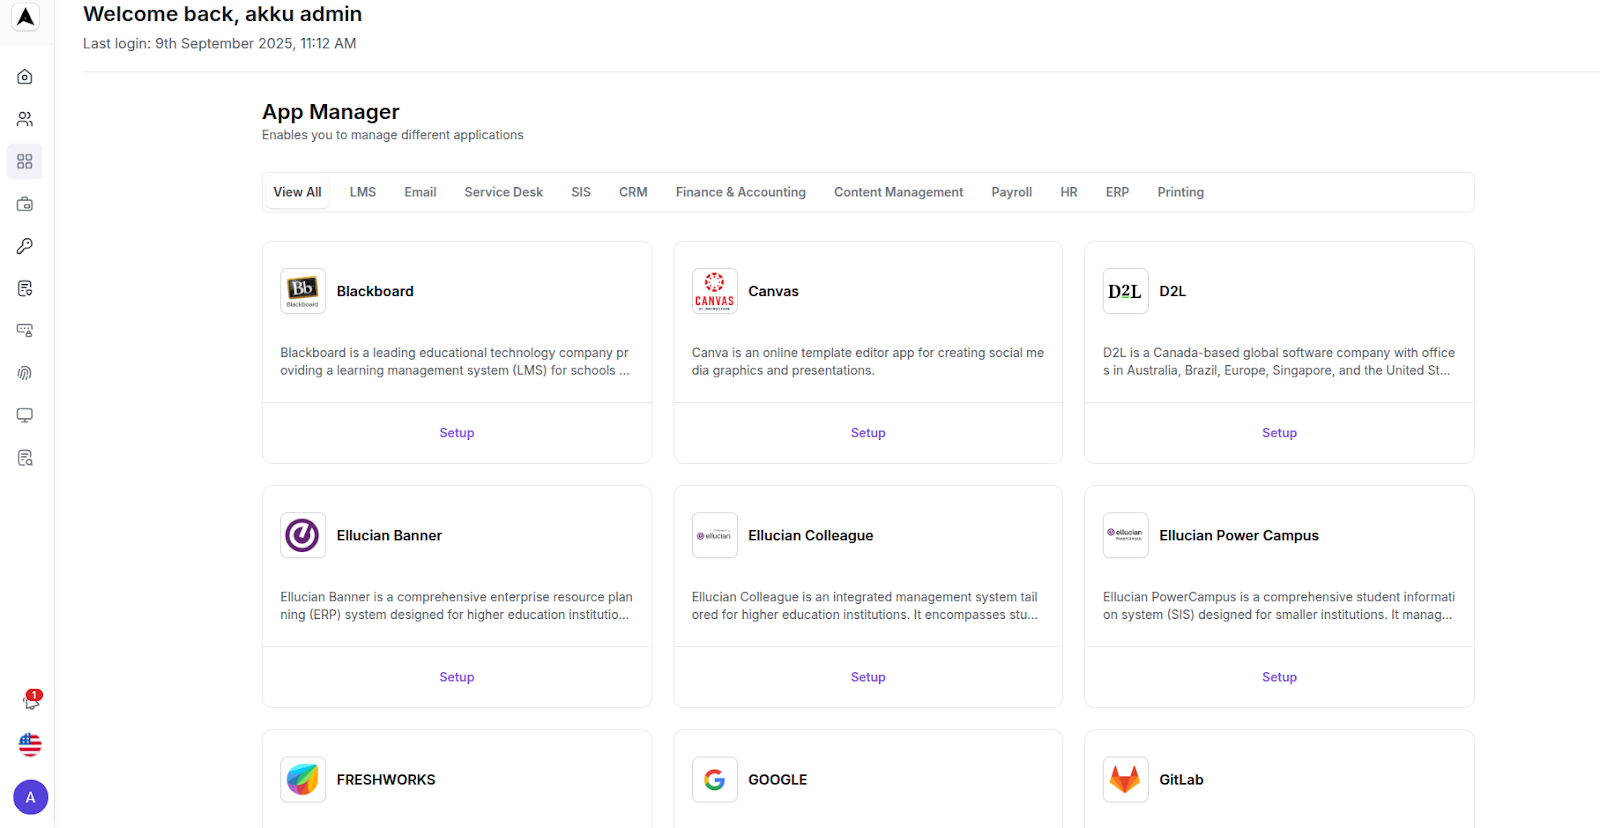
App Manager
When you scroll down further, you will see the App Store section that displays the list of apps available for integration, with each card including the app logo, description, and a Setup button.
App SSO Configuration
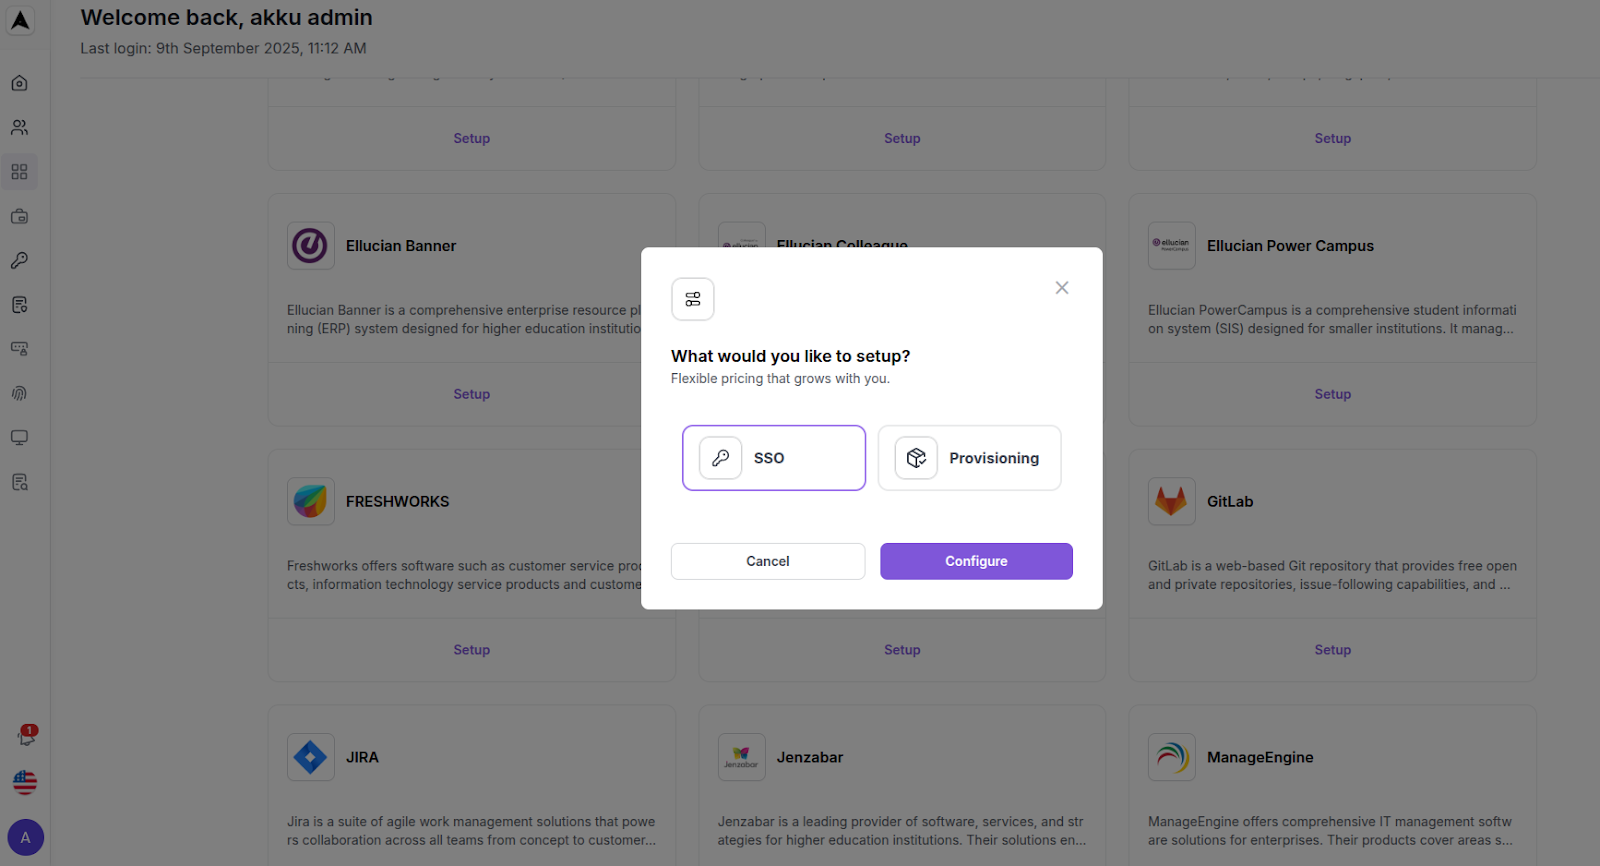
Click on the “Configure” button for an existing app from My Apps, or else click on the "Setup" button for an app from the App Store section.
Let us take Google as an example here for configuration from the App Store.You will be asked whether you would like to configure SSO or Provisioning.
In this chapter, we will look at the process to configure SSO for an app.
SSO Configuration Interface
You will see a setup screen with the following tabs in the same UI
- General Details
- Login Settings
- Advanced Settings
- Integration
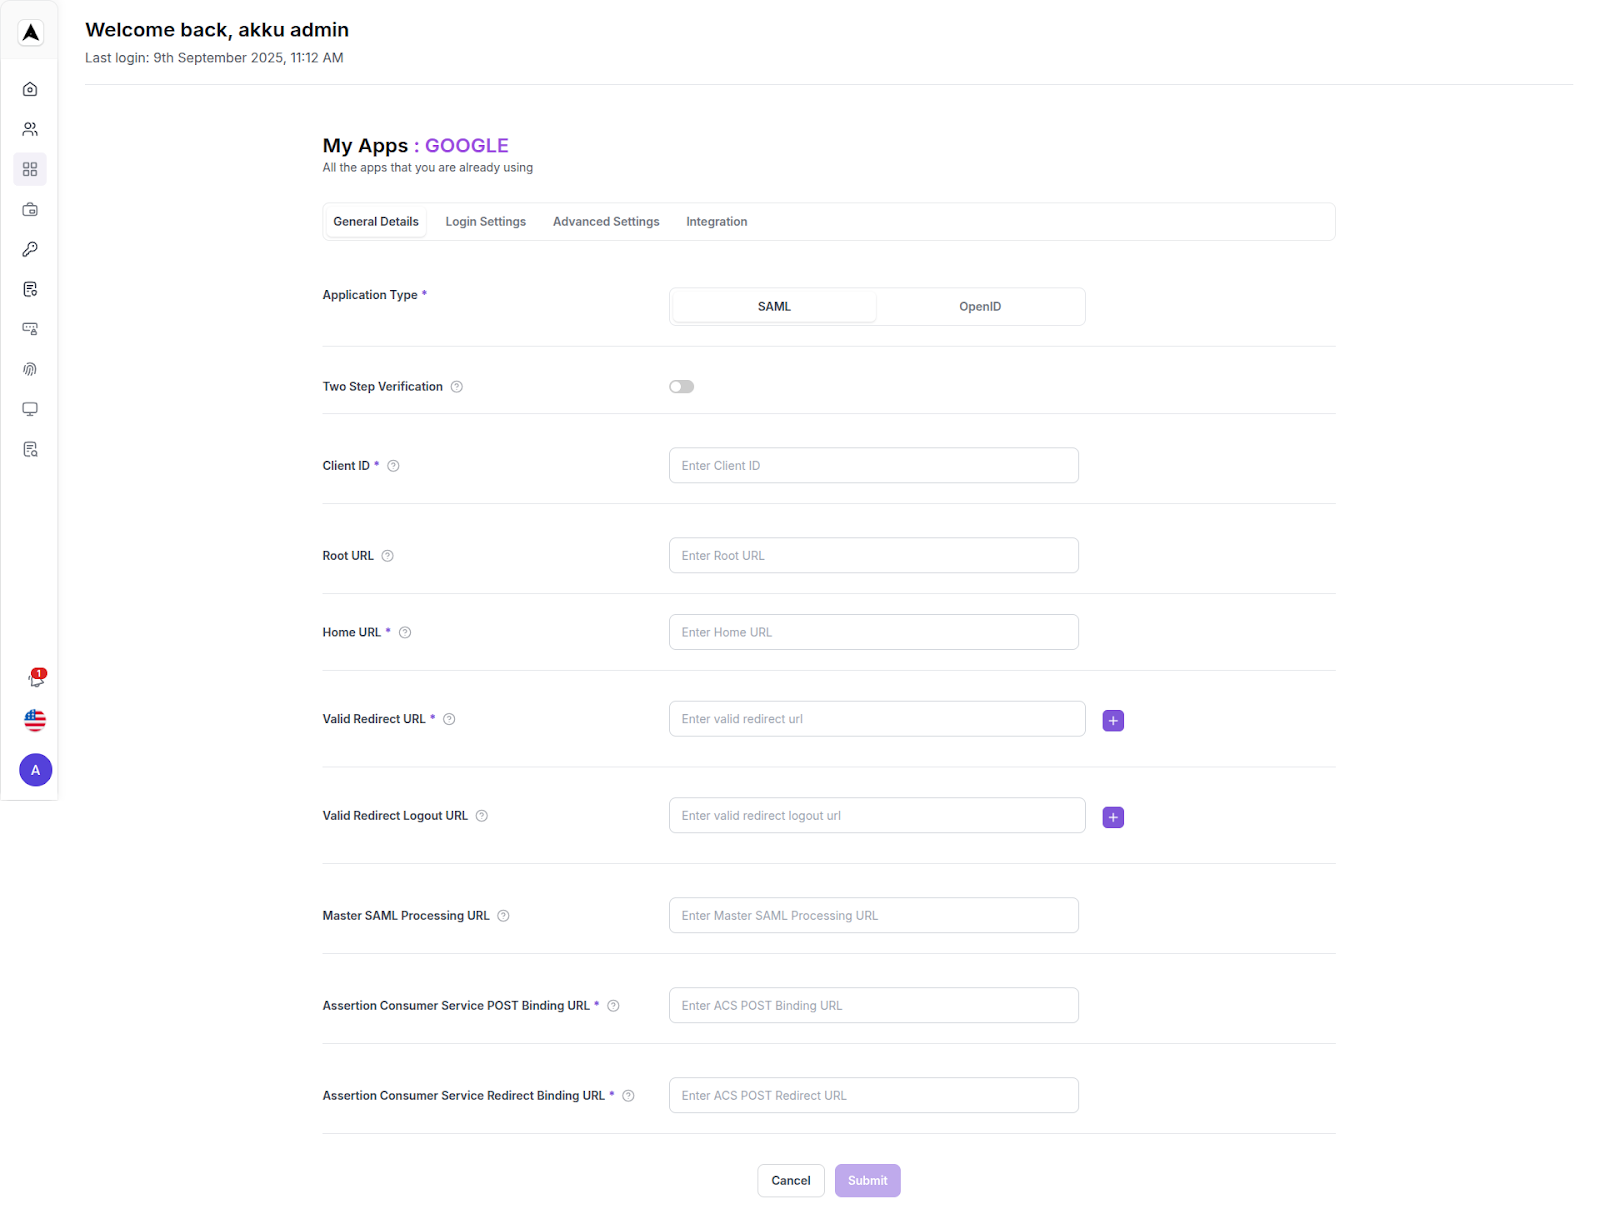
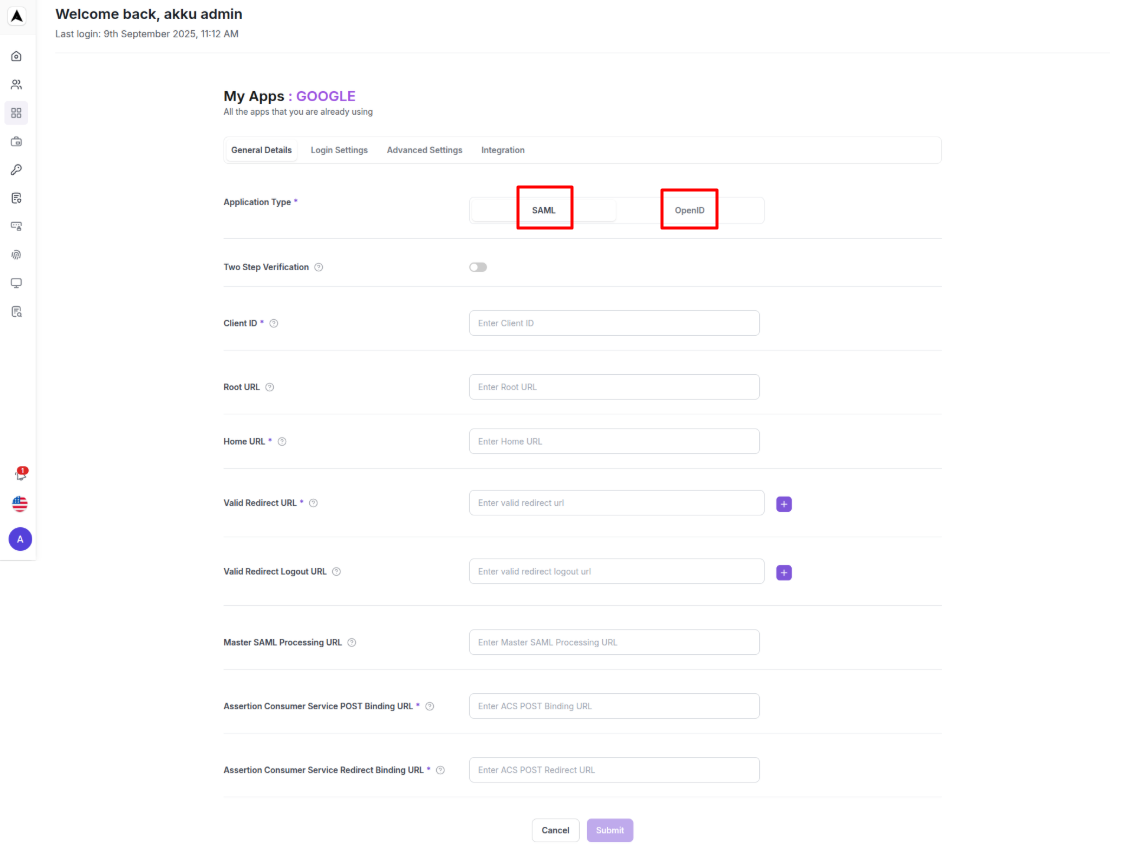
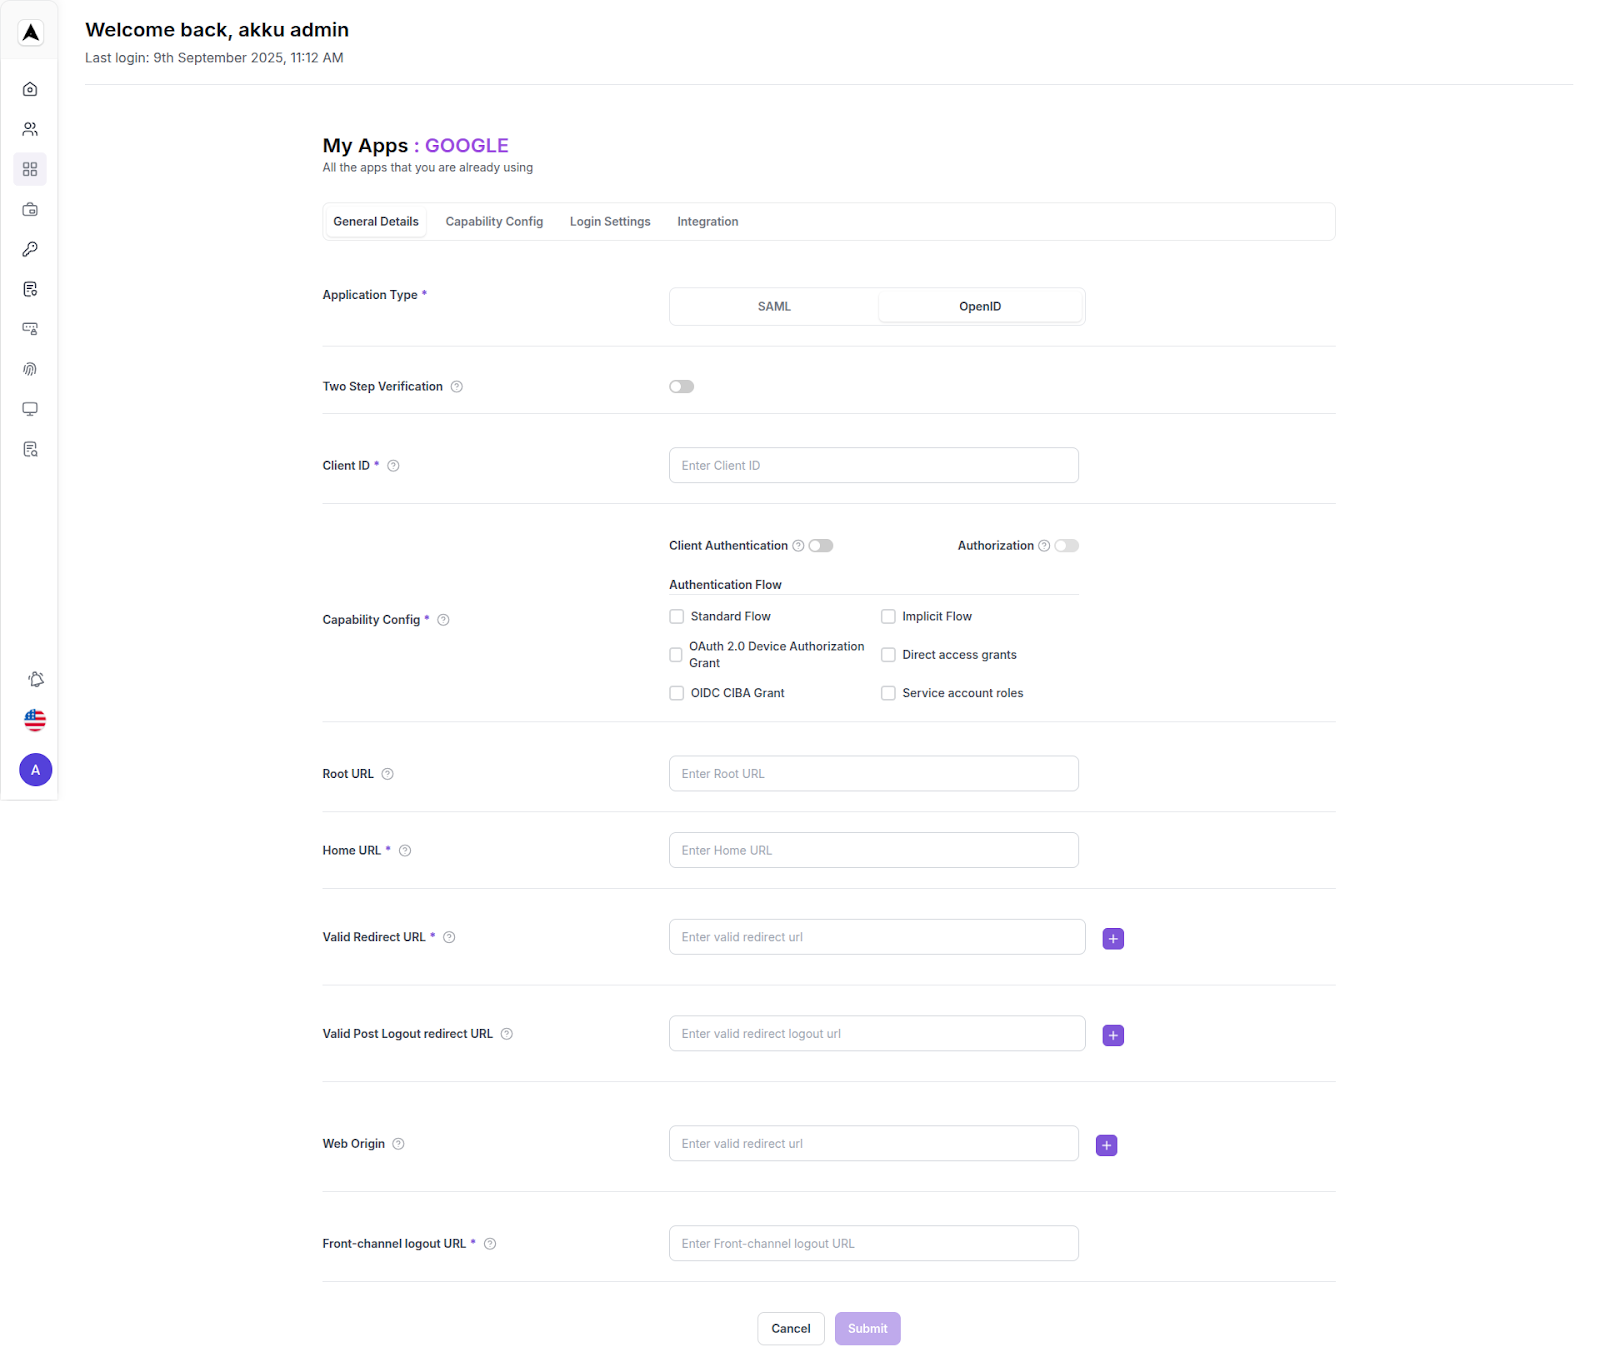
Choose Application Type
Under Application Type, select one of the two options:
- SAML – Use SAML 2.0 for authentication.
- OpenID – Use OIDC for authentication.
NOTE :
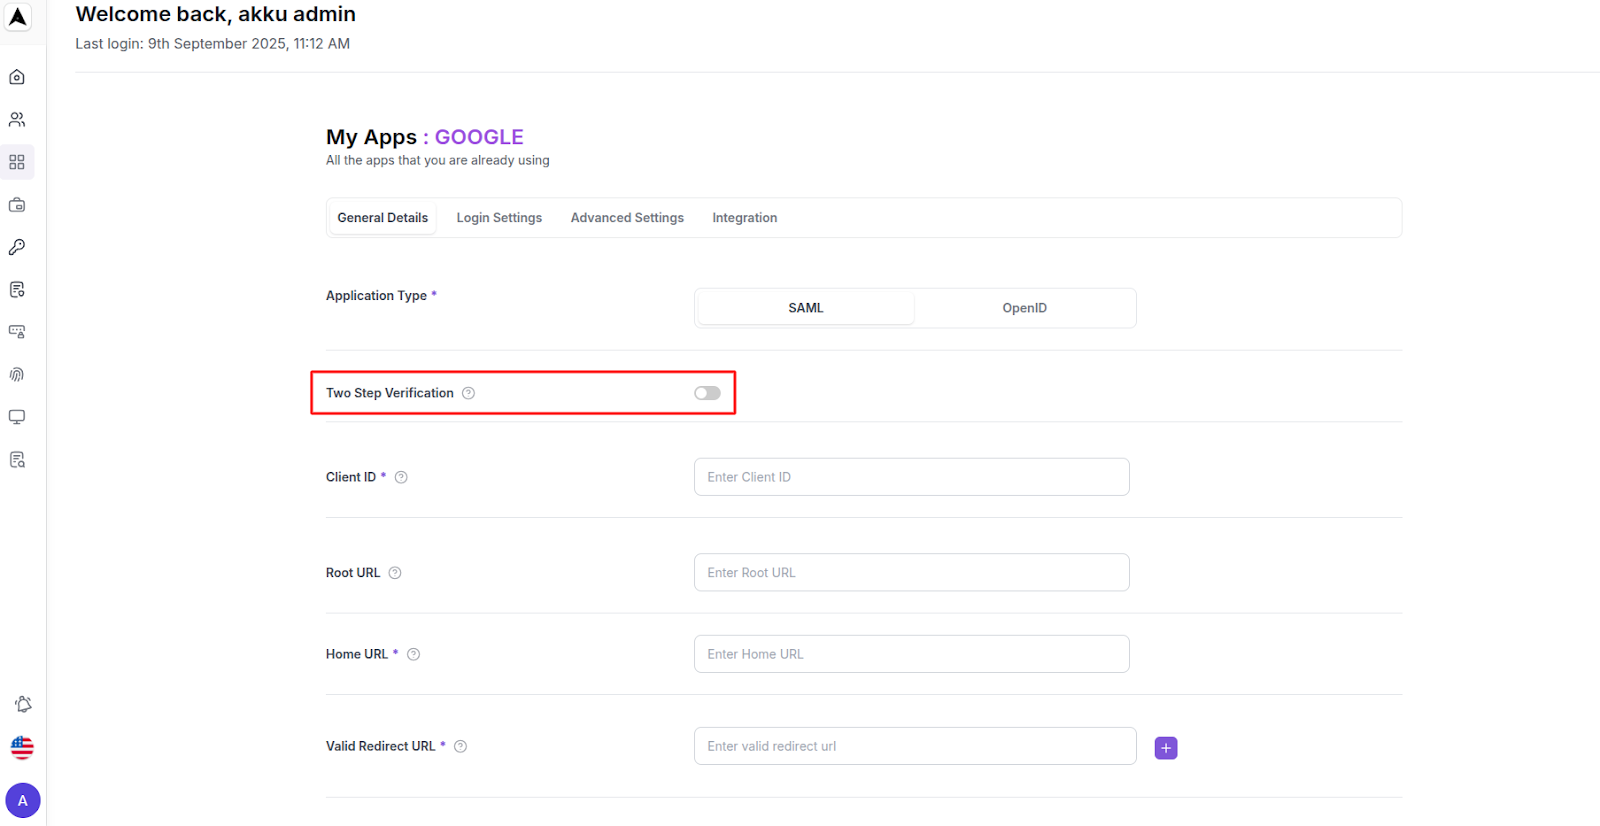
Two Step Verification Section
When you select Two Step Verification while configuring an app in App Management, the system does not allow direct setup. Instead, it displays a message:
“Please Configure the Adaptive MFA.”
This means:
- Two Step Verification for applications is dependent on Adaptive MFA (AMFA).
- Before enabling it here, you must configure Adaptive MFA in the MFA → Adaptive MFA section of the admin console.
- Once AMFA is active, you can enforce additional verification (OTP, Push Notification, etc.) for logins to this specific app.
So Two Step Verification in App Management is just a pointer to Adaptive MFA settings — it cannot work independently.
Fields
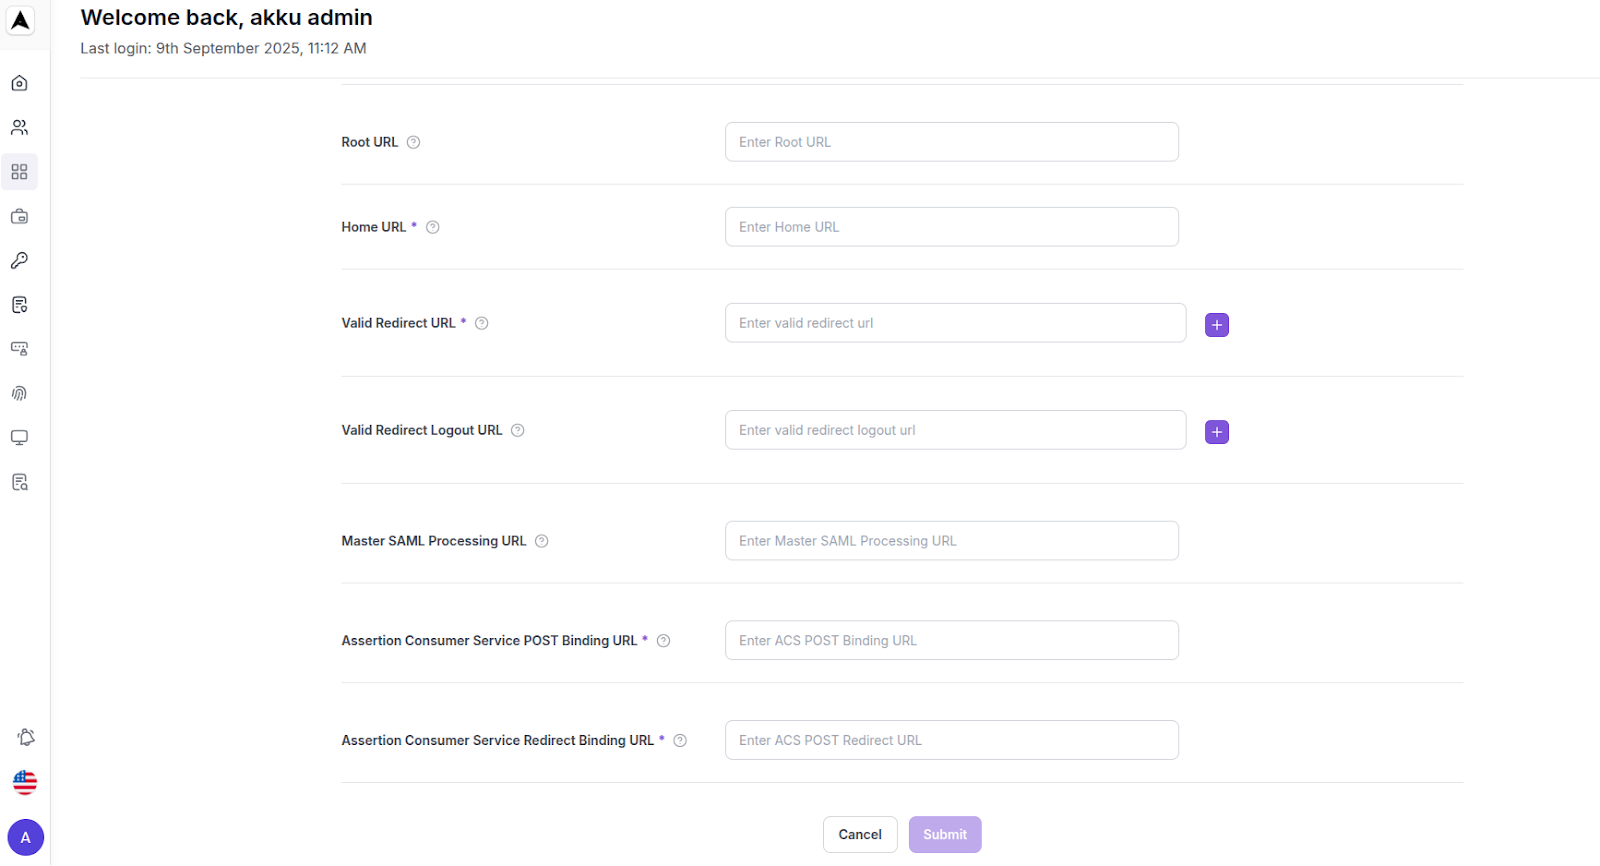
Configure root, home, redirect, logout, and SAML processing URLs
Client ID | Specifies ID referenced in URI and tokens. For example my-client. For SAML this is also the expected issuer value from authentication requests |
Root URL | Enter the root URL to be appended to relative URLs |
Home URL | Enter the default URL to use when the auth server needs to redirect or link back to the client |
Valid Redirect URL(s) | Enter a valid URI pattern that a browser can redirect to after a successful login.
|
Logout URL | Enter a valid URI pattern that a browser can redirect to after a successful logout.
|
Master SAML Processing URL | Enter the default URL for all SAML communication between the Identity Provider and Service Provider, which can be overridden for specific services. This URL can be individually overridden for each binding and service in the Fine Grain SAML Endpoint Configuration |
Advanced Settings:
Assertion Consumer Service (ACS) Endpoints
Configure the URLs used for SAML assertions and redirects
Assertion Consumer Service (ACS) POST Binding URL | Specify the ID referenced in URI and tokens
|
Assertion Consumer Service (ACS) Redirect Binding URL | Specify the ID referenced in URI and tokens
|
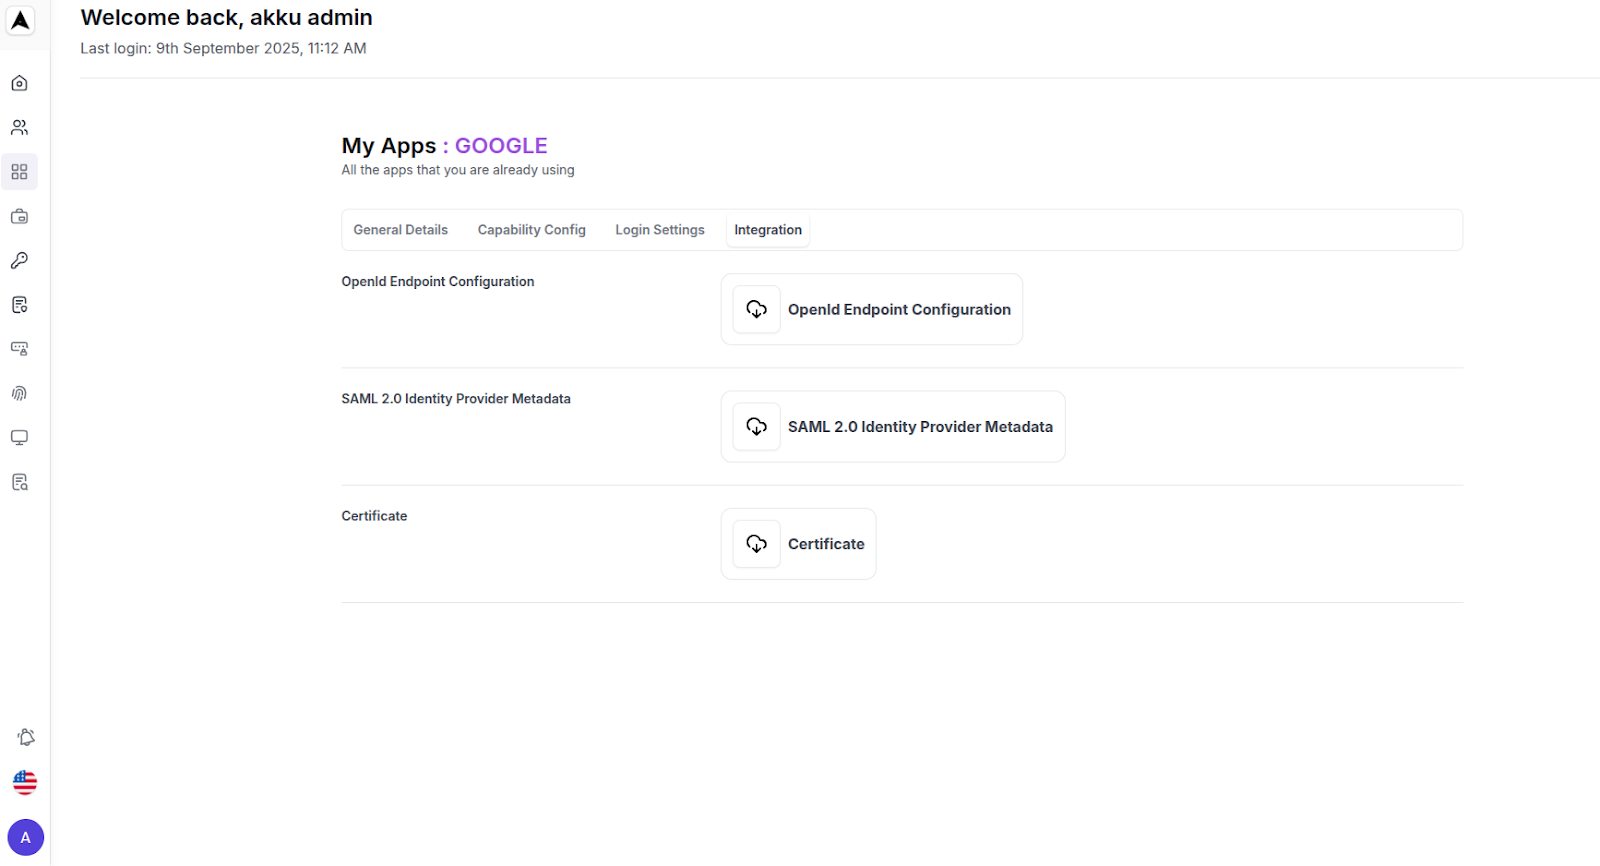
Certificate Viewer:
View, copy, or download your PEM file
Gmail Single Sign-On Integration Guide (with Google Workspace)
After completing the configuration steps detailed above, follow these steps to integrate Gmail with Akku.
Navigating to SSO Settings
Log in to admin.google.com using your administrative credentials, and navigate to “Set up SSO with a Third Party IdP” under “Security”
Configuring SSO URLs and Enabling the Feature
Enable “Set up SSO with third-party Identity Provider” and design Sign-In and Sign-Out URL
Uploading the SSL Certificate
Upload Certificate Under “Verification Certificate” Settings
Enabling Automatic Redirects for Domain-Specific URLs
Navigate to “Domain-specific” service URLs and enable “Automatic redirects”

Save the settings
Functional Testing
- Visit your tenant URL (ex: refex.akku.work)
- Log in with a valid username and password
- On the application wall, launch Gmail
- Gmail should open directly to your mailbox via SSO
Gmail Single Sign-On Integration Guide A Step-By-Step Self-Help Guide for Gmail Application Integration with Akku