User Management
Overview
In the Manage Users section of the Akku IAM dashboard, administrators can perform all essential user-related operations, including:
- Creating users individually or in bulk by importing CSV files
- Importing users via directory services (LDAP/AD/Kerberos)
- Creating and managing user groups
- Editing or deleting users
Watch Video
Navigation Path
Create New User
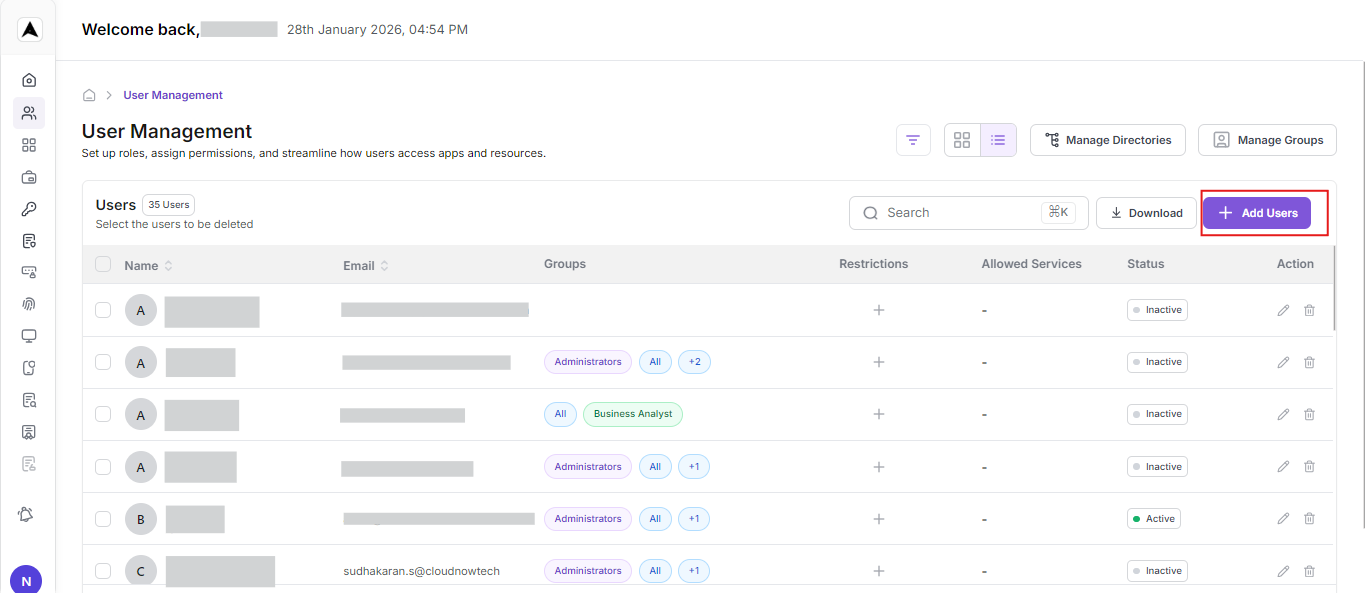
1. Navigate to User Management from the left sidebar.
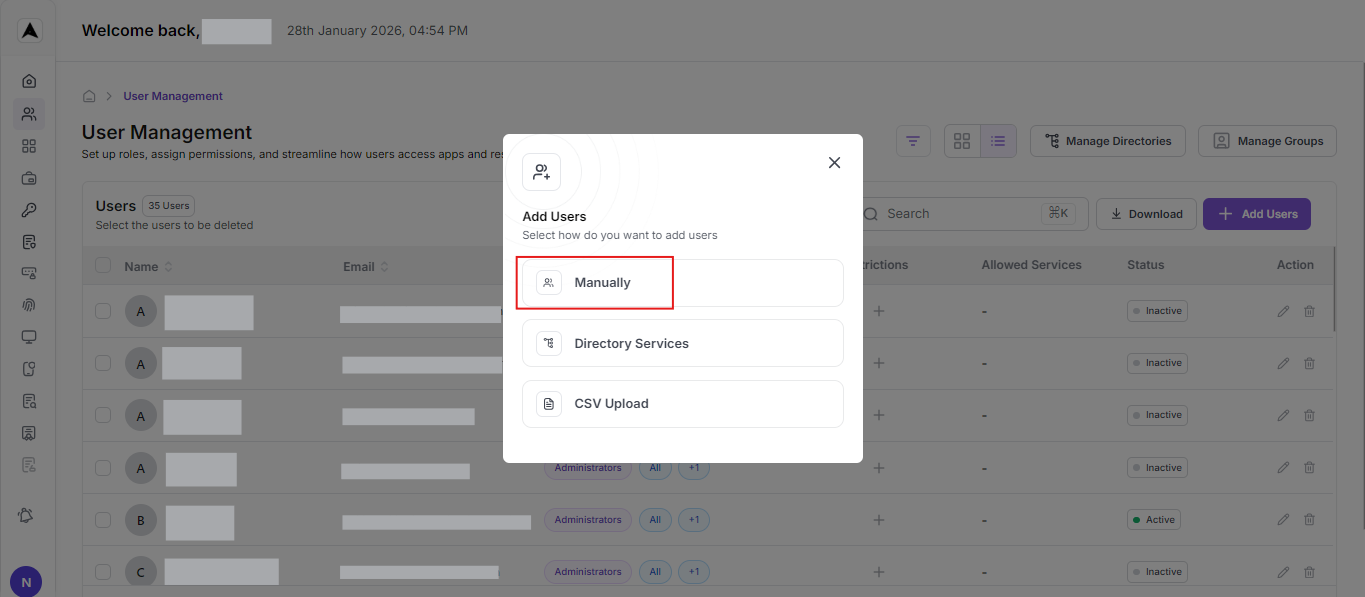
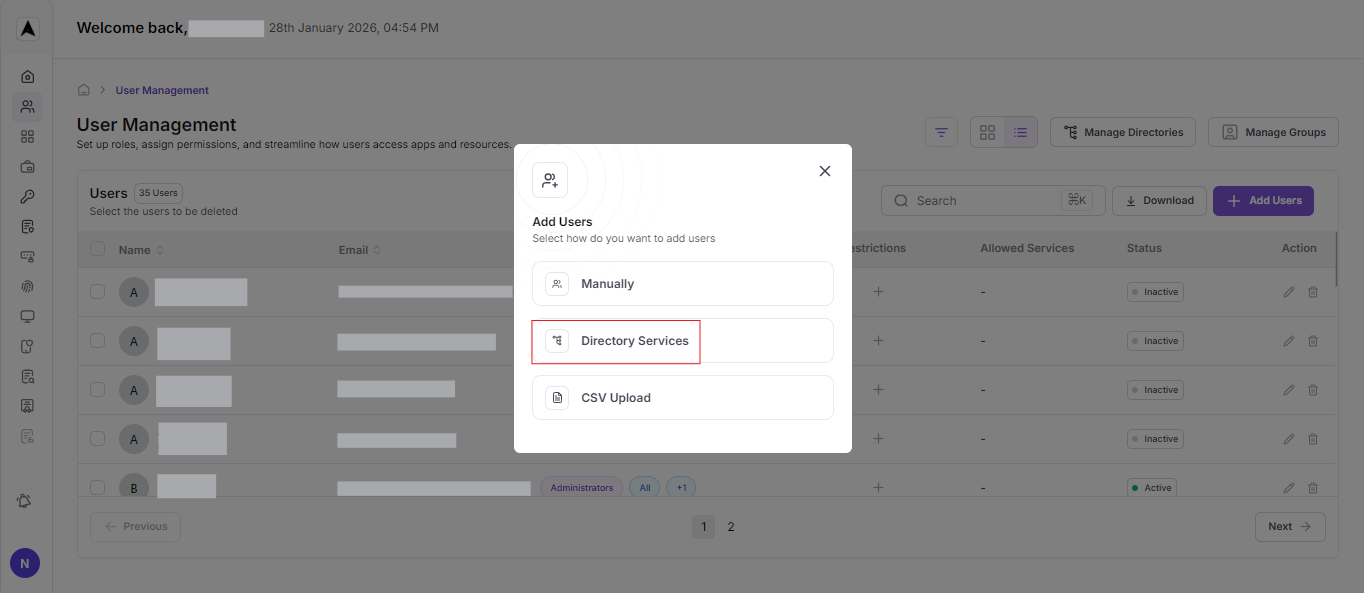
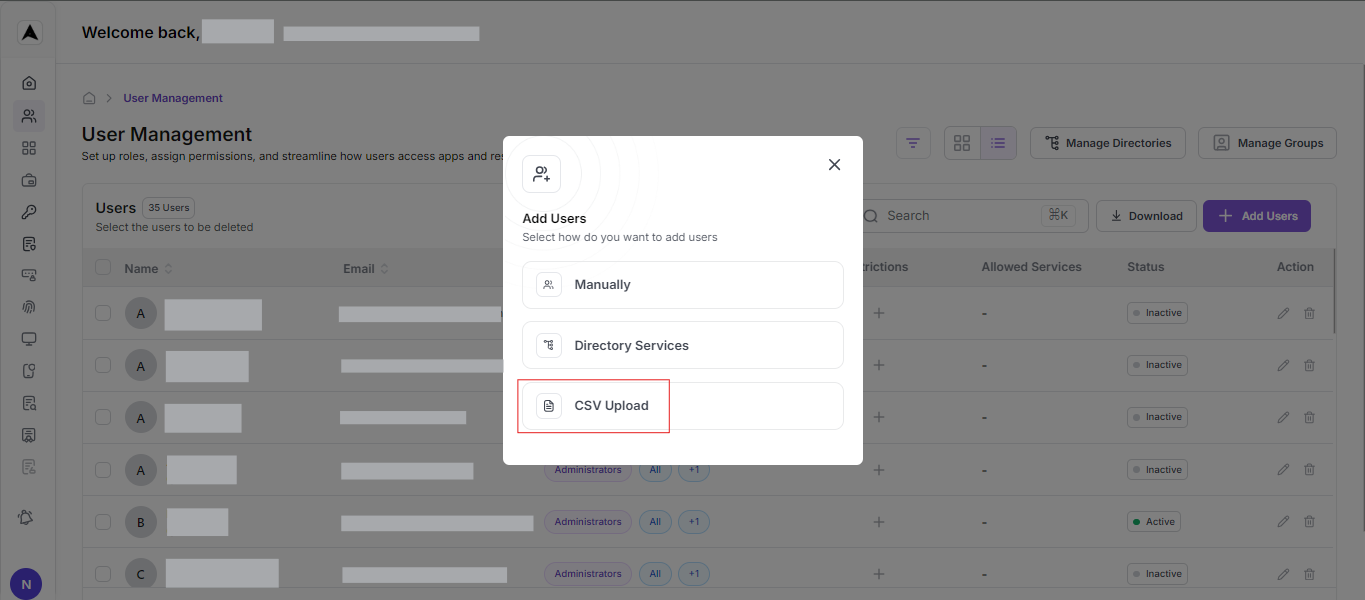
2. Click the Add Users button at the top right of the page to initiate user creation. You will be prompted to choose from three options:
- Manual
- Directory Services
- CSV Upload
Create New User (Manual Entry)
You can manually add users by entering the details. This is best suited for adding a single user.
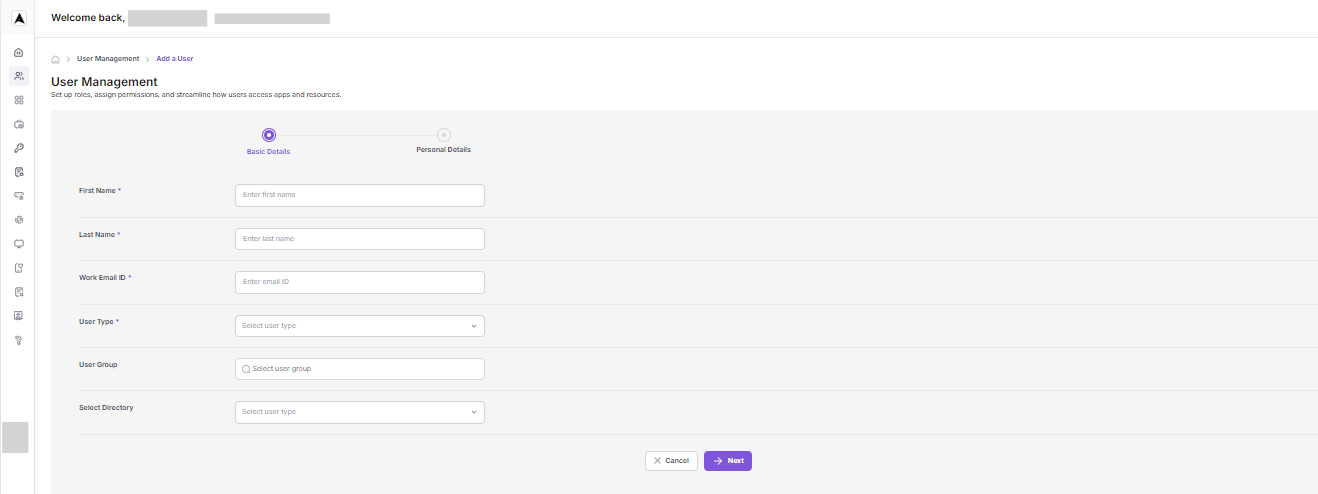
Basic Details
Start by filling in the following Basic Details :
| User Field | Entry Requirement |
|---|---|
| First Name | Enter the first name of the user |
| Last Name | Enter the last name of the user |
| Work Email ID | Used as the user's primary identifier |
| User Type | Select either User or Admin |
| Group | Assign the user to a predefined group |
Fill in the following Personal Details:
| User Field | Entry Requirement |
|---|---|
| Mobile Number | Enter the mobile number of the user |
| Personal Email ID | Enter the personal email ID of the user |
You can also add custom fields to meet your organization’s specific needs.
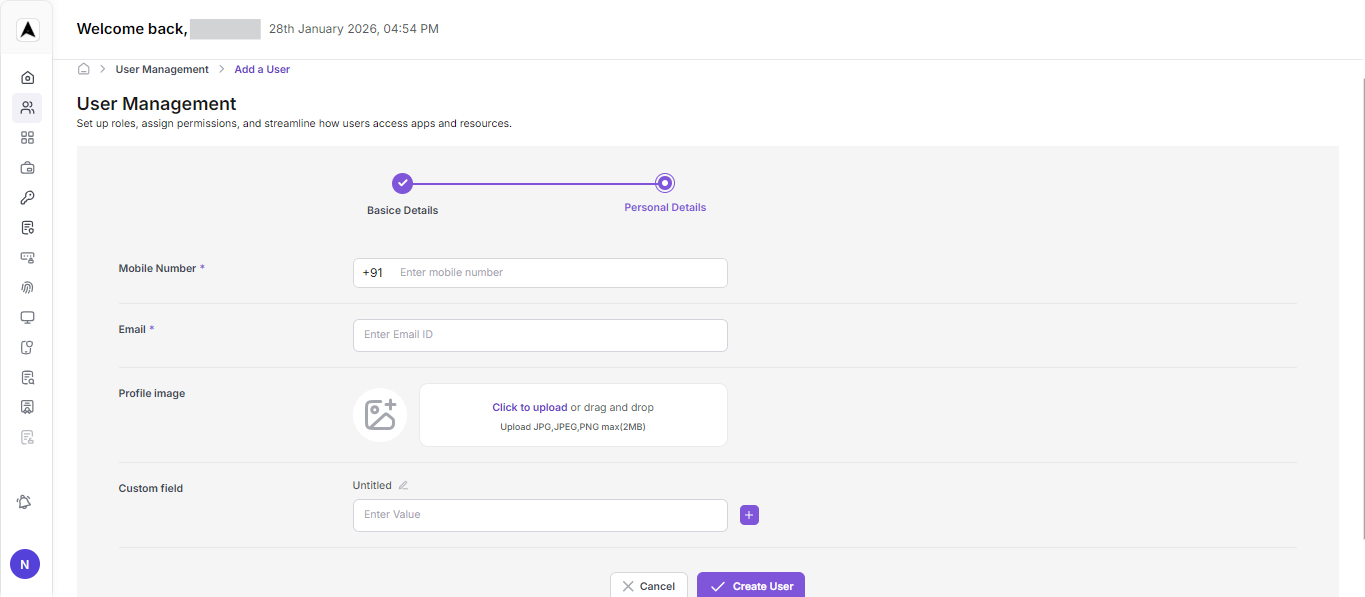
Click Save to complete user creation.
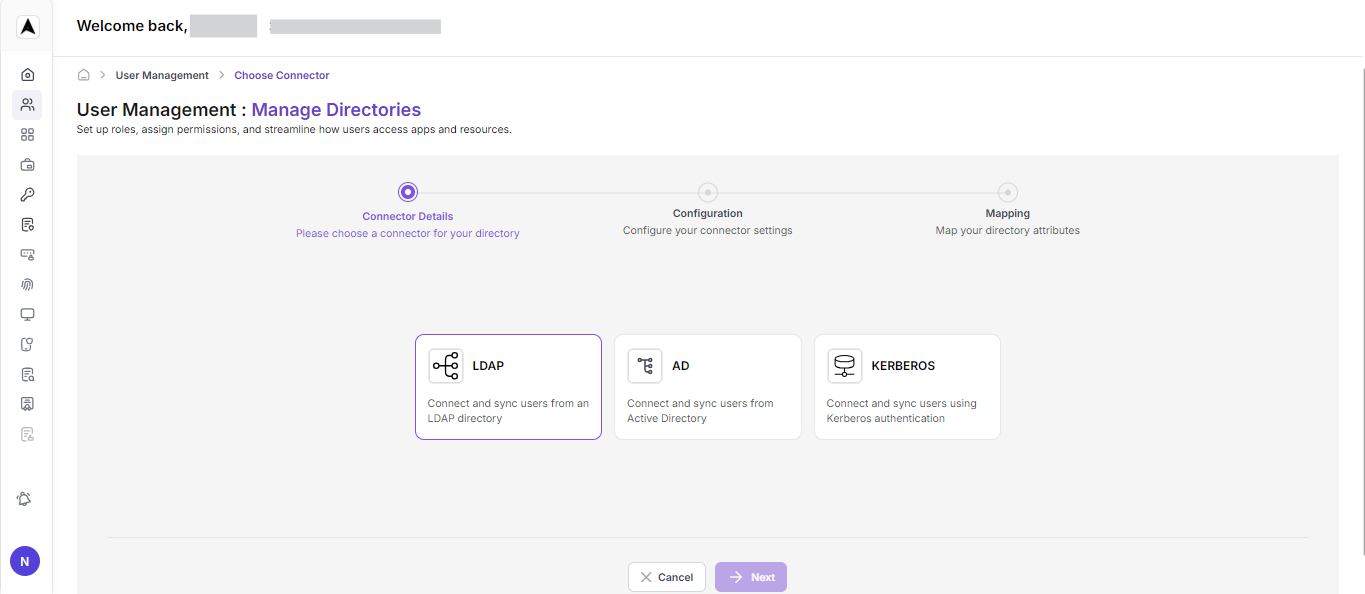
Create New Users (Directory Integration)
You can integrate Akku with a user directory to import users.
Akku can be integrated with a range of external directory services:
- LDAP
- Active Directory (AD)
- Kerberos
1. Configure Authentication:
| LDAP Parameter | Configuration Instruction |
|---|---|
| Directory Name | Enter the name of the directory |
| Connection URL | Enter the LDAP server URL |
| Bind Type | Select Simple |
| Bind DN | Enter the Bind Distinguished Name |
| Bind Credentials | Enter the password/credentials |
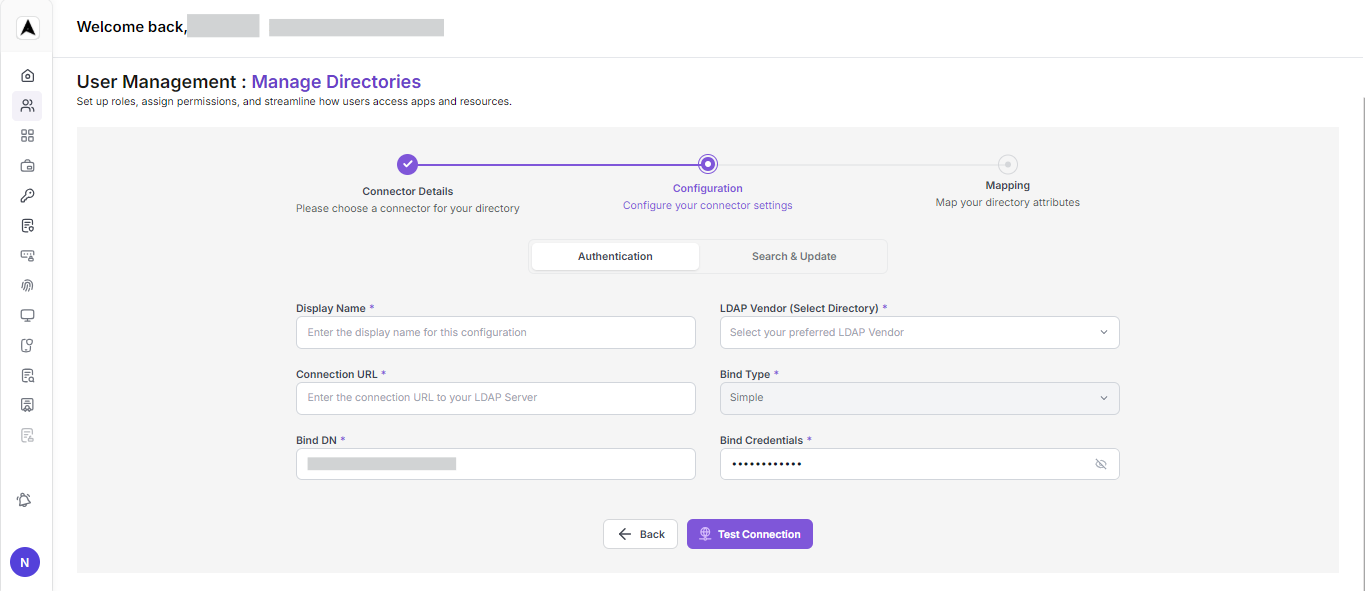
Click Test Connection to validate the connection. The status displayed will be “Testing in Progress...”, followed by “Success” if the configuration is completed successfully.
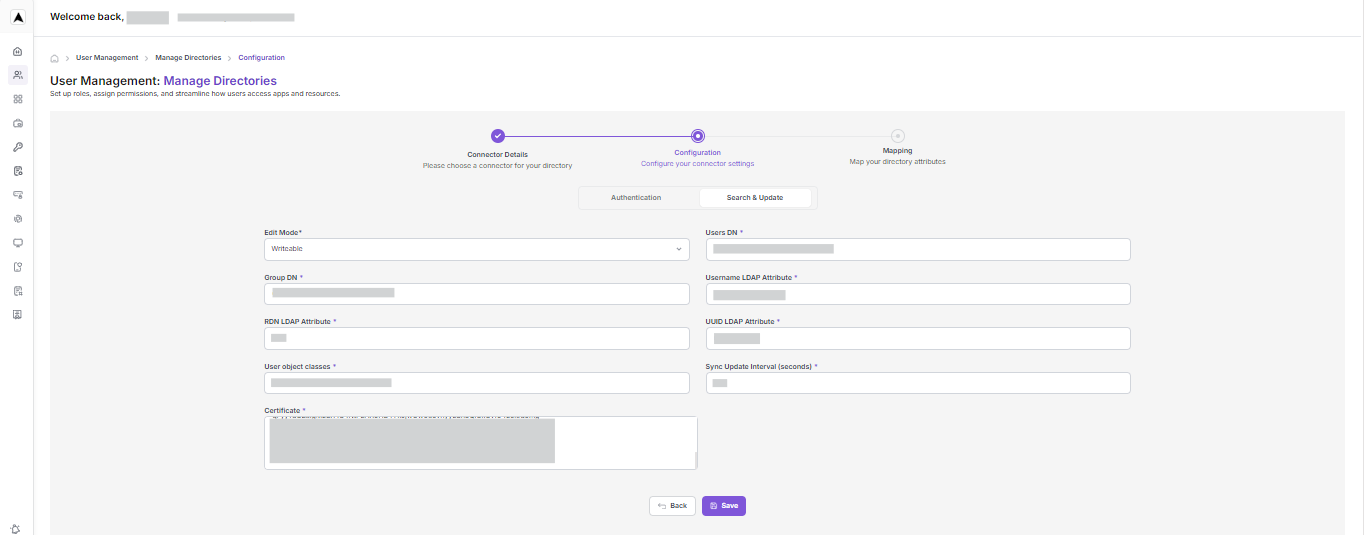
2. Configure - Search and Update
| LDAP Configuration | Setup Instruction |
|---|---|
| Edit Mode | Select Writeable |
| Users DN | Enter the Base DN from where users are fetched |
| Username LDAP Attribute | Enter the appropriate value - for example, 'uid' |
| RDN LDAP Attribute | Enter the appropriate value - for example, 'cn' |
| UUID LDAP Attribute | Enter the unique identifier |
| User Object Classes | Enter a comma-separated list (for example, inetOrgPerson) |
| Sync Update Interval | Enter the value in seconds) |
| Certificate | Upload if applicable) |
3. Mapping Attributes
Review the mapping between the LDAP and Akku IAM fields.
| SOURCE (LDAP) | TARGET (Akku) | TRANSFORMATION |
|---|---|---|
| sn | Last Name | user-attribute-ldap-mapper |
| givenName | First Name | user-attribute-ldap-mapper |
| user-attribute-ldap-mapper | ||
| Default | Default | msad-user-account-control-mapper |
| whenCreated | Create Timestamp | user-attribute-ldap-mapper |
| whenChanged | Modify Timestamp | user-attribute-ldap-mapper |
| cn | Username | user-attribute-ldap-mapper |
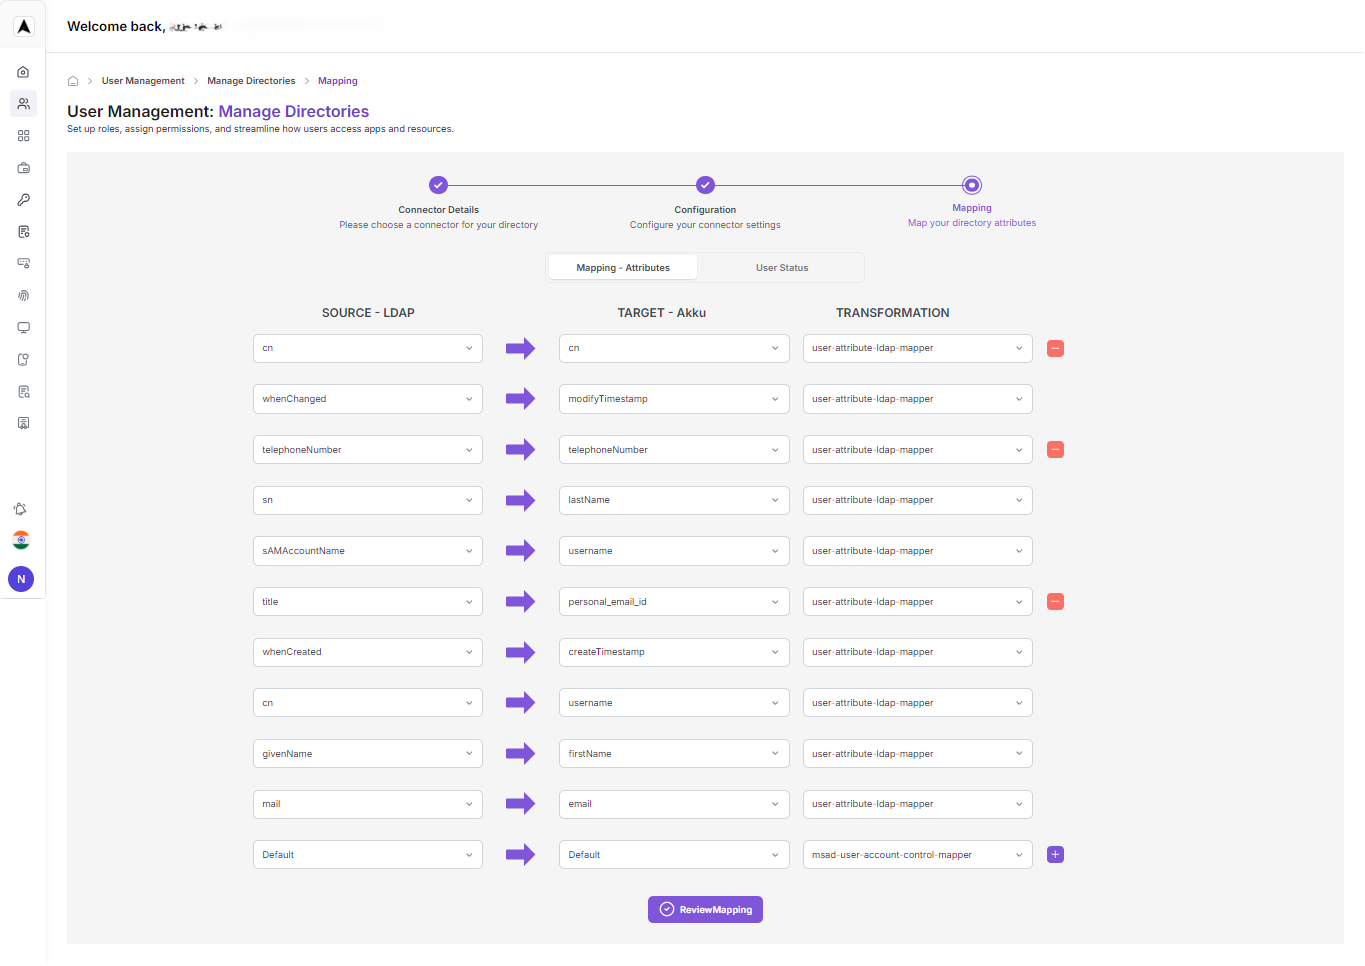
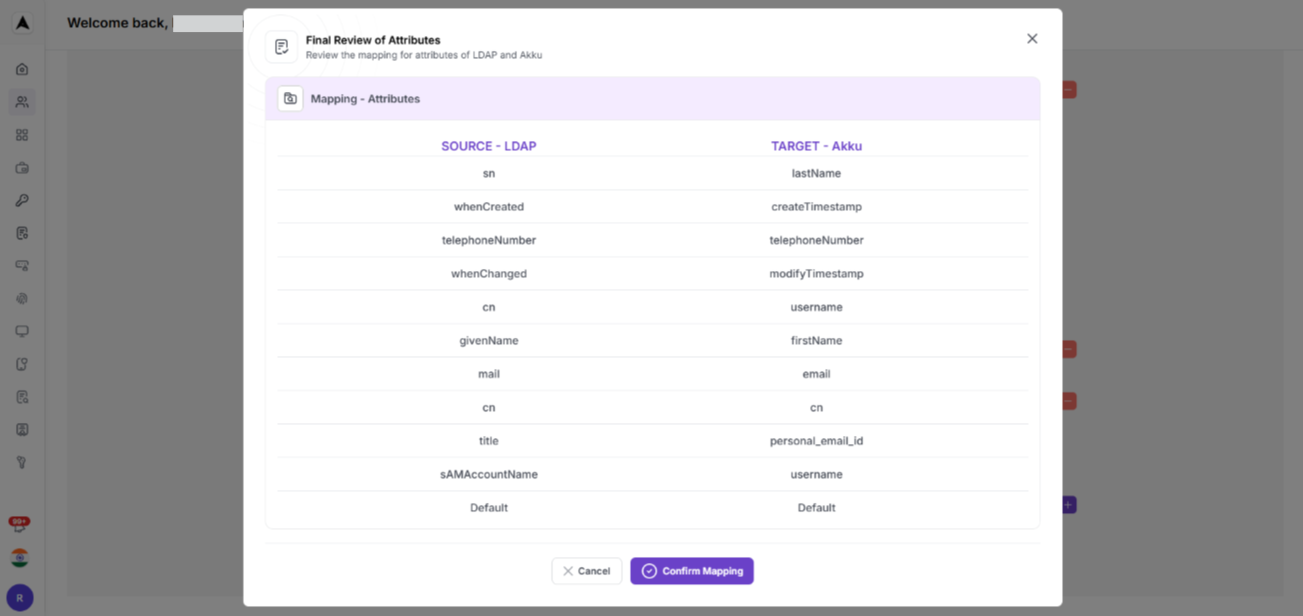
Click on Review Mapping to review the user data as shown below.
| Source (LDAP) | Target (Akku) |
|---|---|
| sn | Last Name |
| givenName | First Name |
| whenCreated | Create Timestamp |
| whenChanged | Modify Timestamp |
| cn | Username |
4. Mapper Sync Options
Select from the following option for the Action field on the Mapper Sync screen:
- Sync Changed Users
- Sync All Users
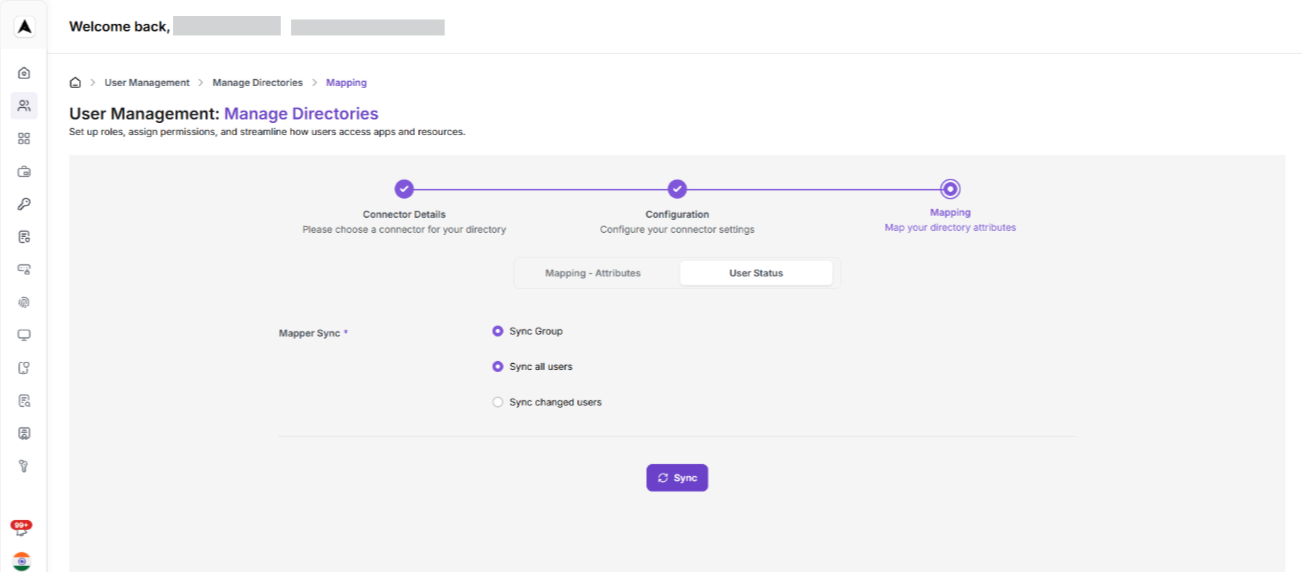
Click on Sync on the bottom right to complete the process.
The LDAP Name now appears under Connected Directories.
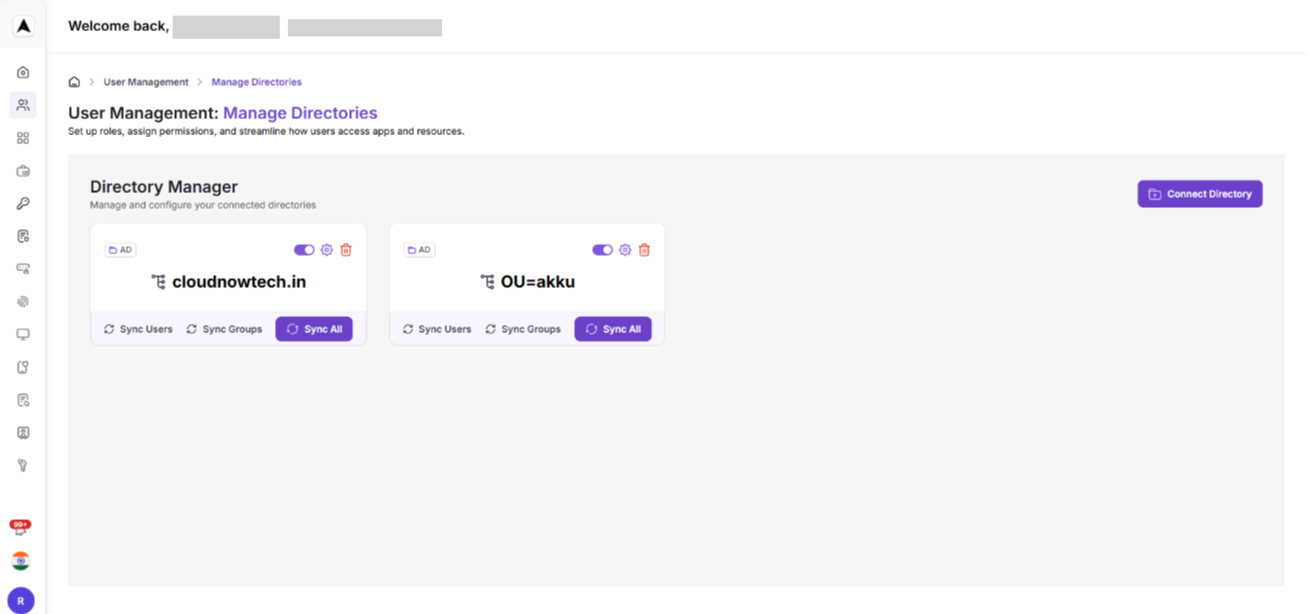
The same process applies to Active Directory and Kerberos.
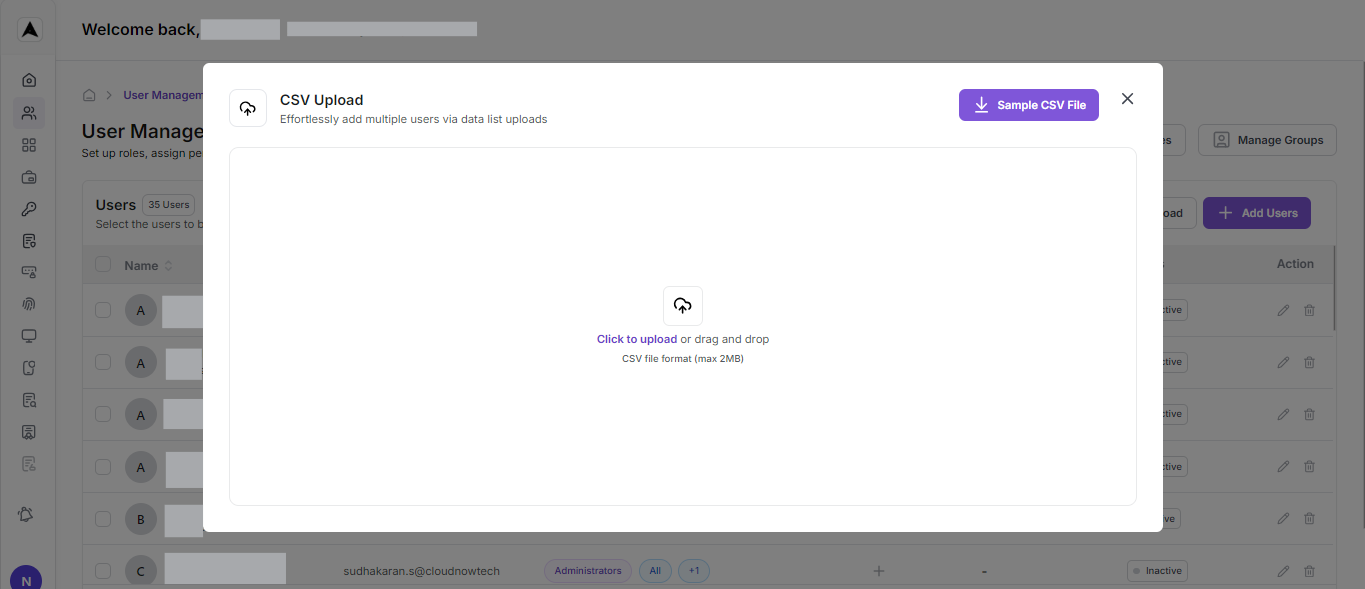
User Creation (CSV Upload)
Bulk User Management in Akku IAM allows administrators to efficiently perform bulk creation, deletion, and updation of user accounts using a CSV upload. This feature streamlines the user onboarding and management process, especially for large organizations.
- Download Sample File: A template file named Sample CSV File will be available for download to ensure correct formatting.
- Upload CSV: Either click “Click to Upload” or drag and drop your CSV file into the upload area.
- Maximum file size: 2MB
CSV File Format:
| S No | First Name | Last Name | Work Email ID | Country Code | Mobile Number | Personal Email ID | Department | Group | Plan Name |
|---|---|---|---|---|---|---|---|---|---|
| 1 | Jhon | Doe | john.deo@abc.com | 91 | 1234567890 | j.doe@gmail.com | Sales | Group A | Basic |
Make sure the headers match the required format to ensure proper processing
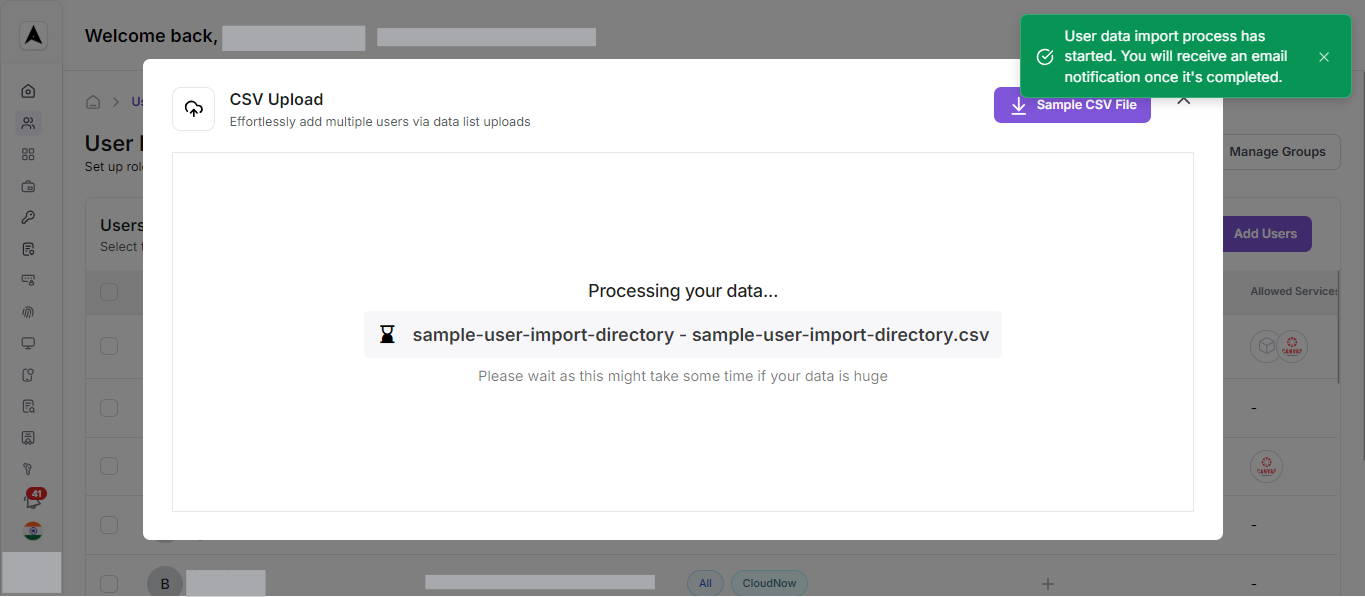
- Once your file is uploaded, a message appears: Processing your data... filename.csv. Please wait as this might take some time if your data is huge.
- Upon successful upload, a pop-up message will be displayed: User data import process has started. You will receive an email notification once it's completed.
- This ensures you’re notified when the action is completed and if any rows failed during processing.
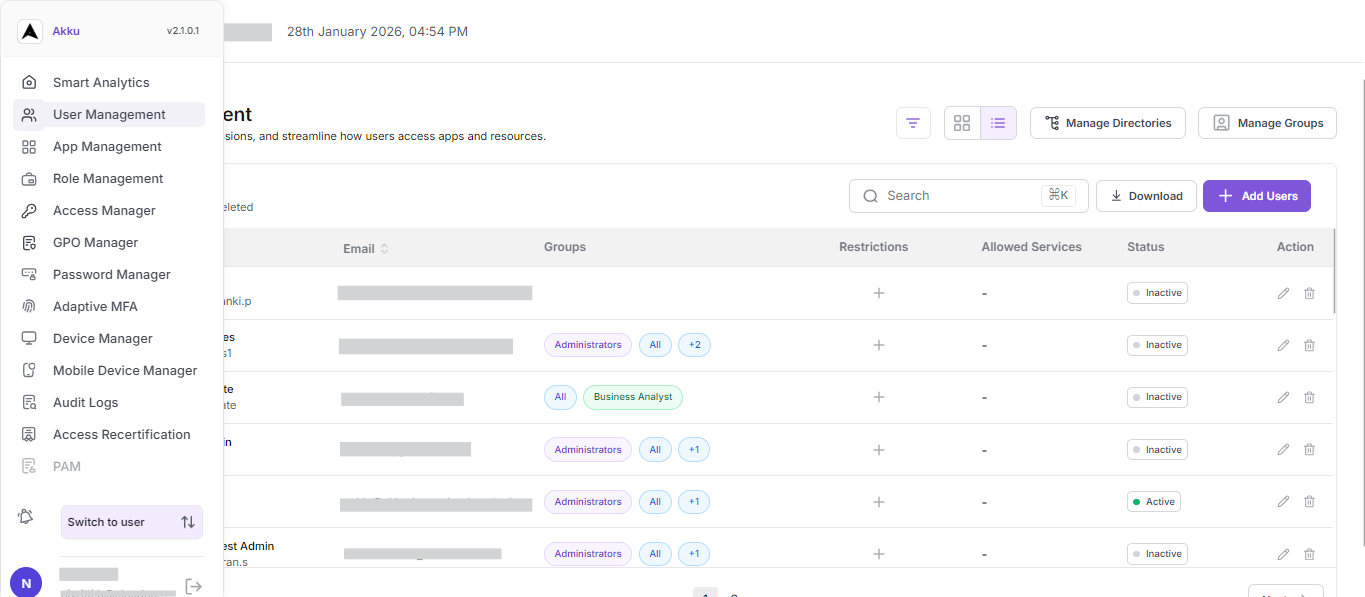
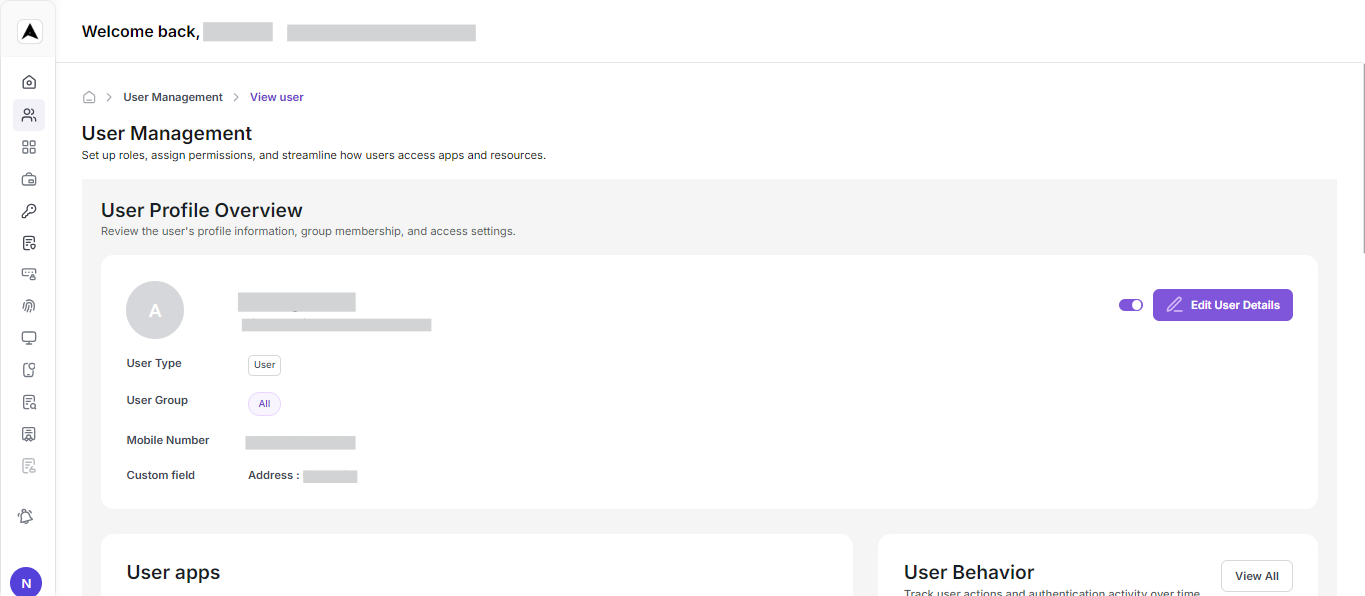
Manage User Profiles
- After adding your users, you can view and modify specific user data from the User List.
- Navigate to User Management from the left sidebar
- You will see the User Management screen where the User List is displayed
- Click on a specific user's Name - the User Details panel opens, offering a comprehensive overview and control options
- Each of these fields can be updated by clicking the Edit Information button.

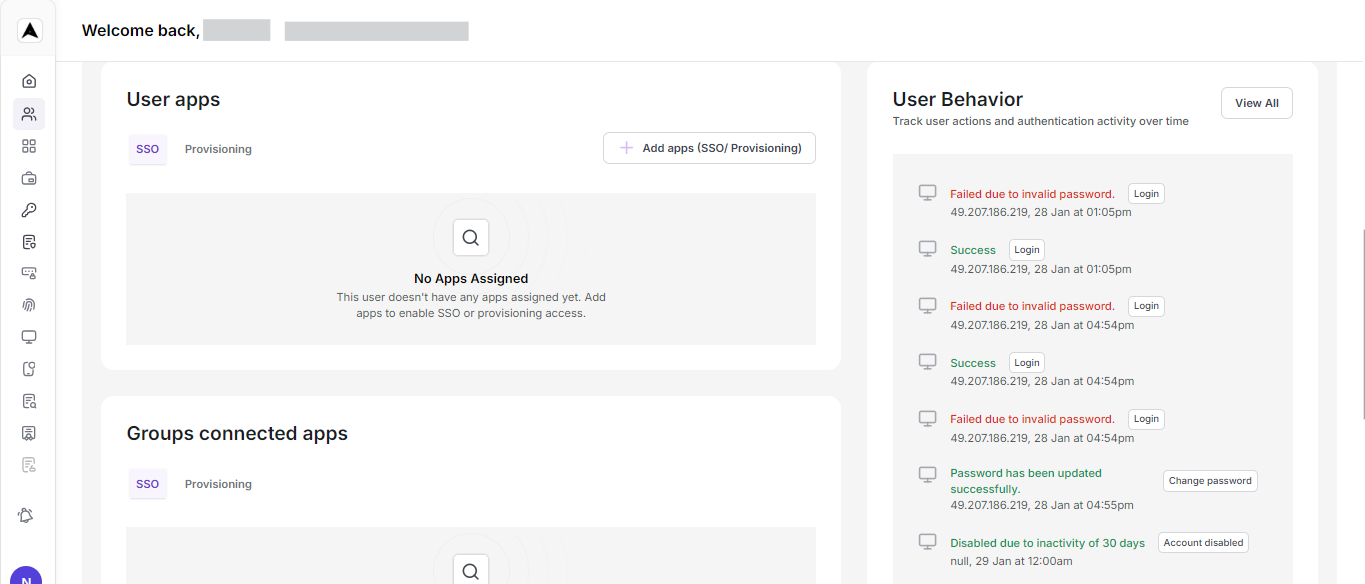
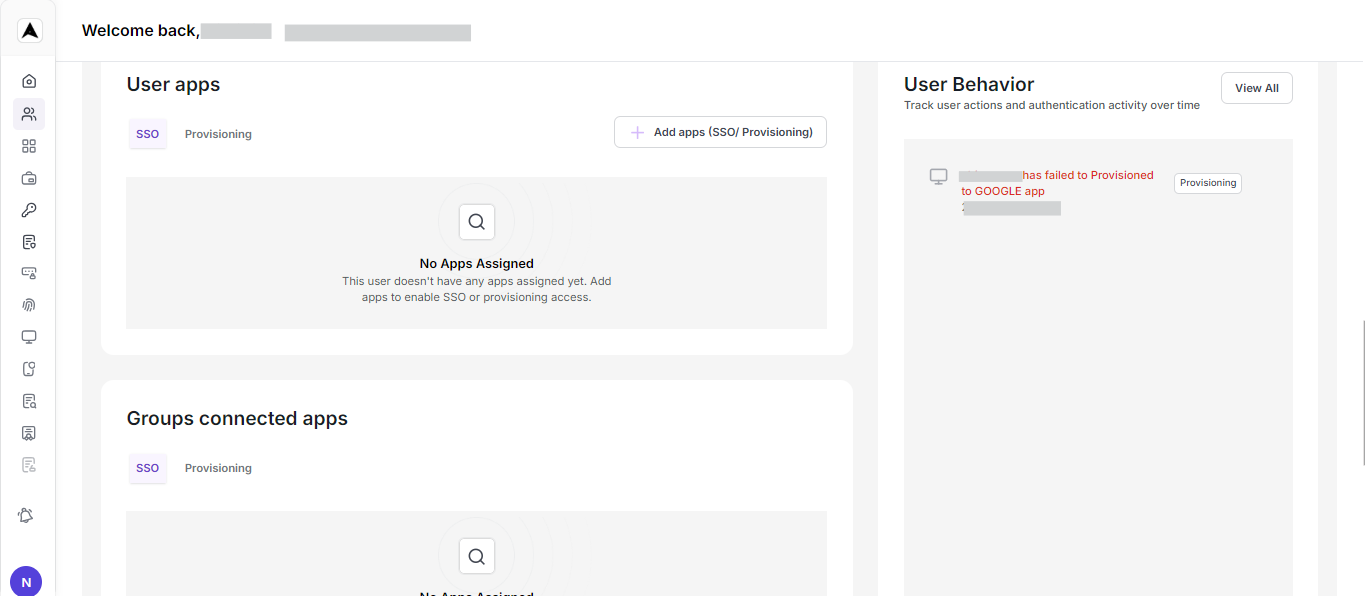
User Apps
- This section shows all app connections established for the user, whether they are SSO integrated, provisioned, or group assigned.
- If no apps are linked, the system will display "No records found".
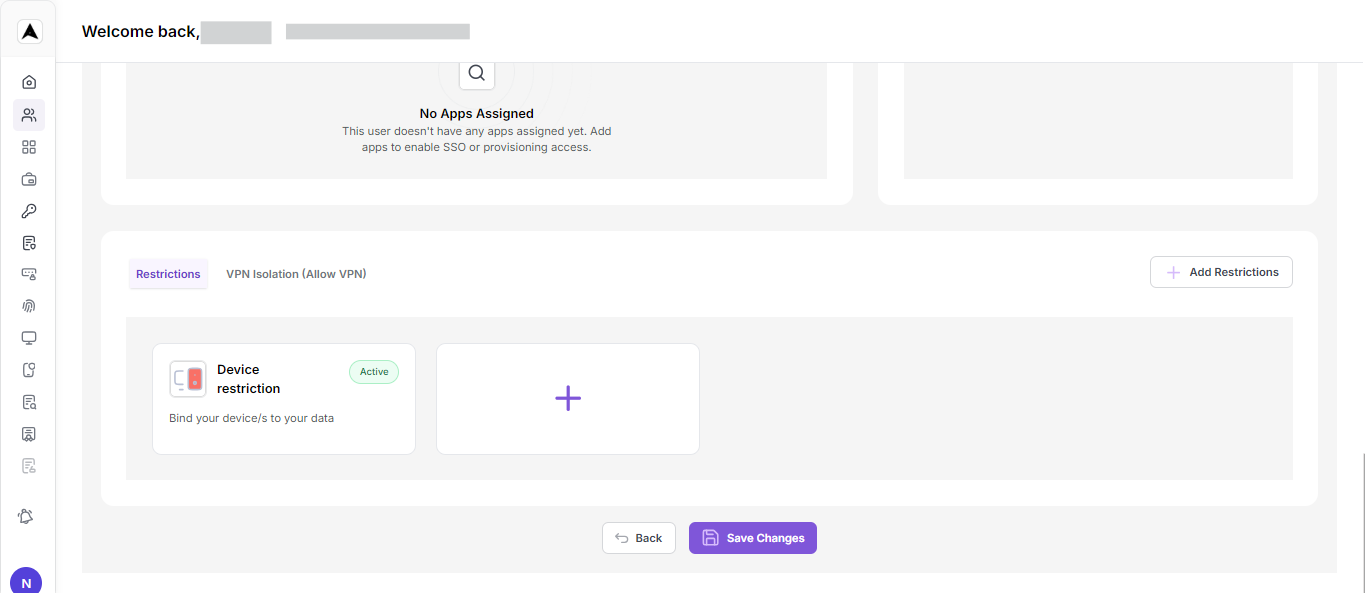
Restrictions
This section highlights any restrictions or policies applied to the user, such as login restrictions, time-based access, or device rules. If no restrictions are applied, the system will display "No records found".
User Behaviour
In this section, you can track actions performed by the user through system logs. If the user has not triggered any events yet, the system will display "User audit logs not found".