MSSP - Workflow (Smart Analytics)
The MSSP (Managed Security Service Provider) module in Akku IAM enables partner administrators to manage and monitor multiple customer tenants from a centralized dashboard. Key capabilities include tenant creation, license management, plan assignment, email configuration, SSO session controls, adoption analytics, and more.
Navigating to MSSP Dashboard
Login to the Akku Tenant Admin Console.
Navigate to Smart Analytics.
Scroll down to find the Tenants section.
View tenant details: Name, Parent, Licenses, Plan, Adoption Rate, Renewal Date, Revenue, and Status.
Smart Analysis Module (Akku Admin View)
Navigate to the Admin Console.
Navigation Path
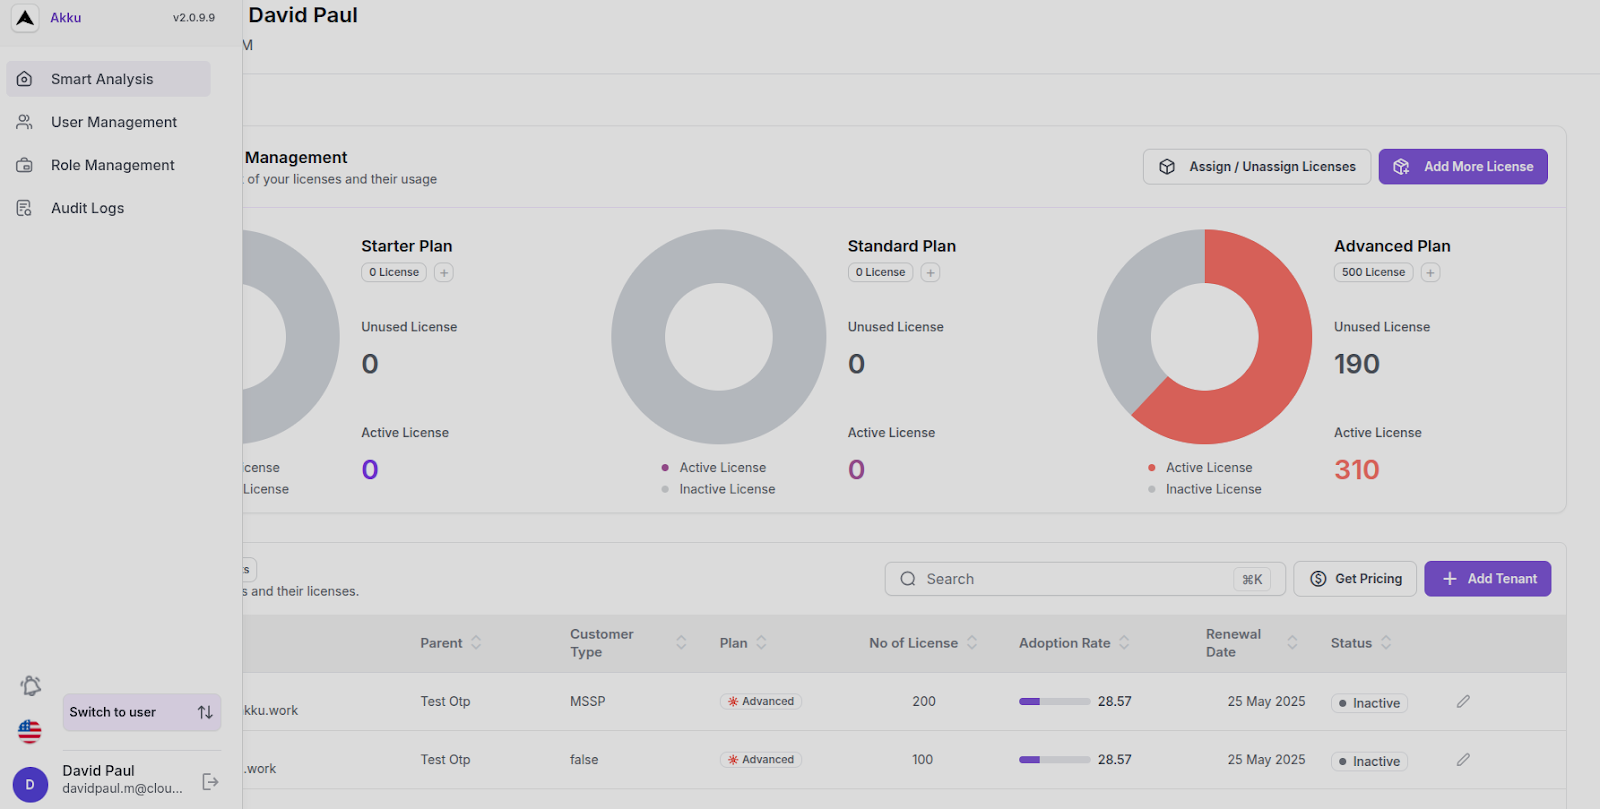
License Management Section
Overview Cards:
Starter Plan
- Unused Licenses:0
- Active Licenses:0
Standard Plan
- Unused Licenses:0
- Active Licenses:0
Advanced Plan
- Unused Licenses:190
- Active Licenses:310
Actions:
- Assign / Unassign Licenses
- Add More License
Screenshot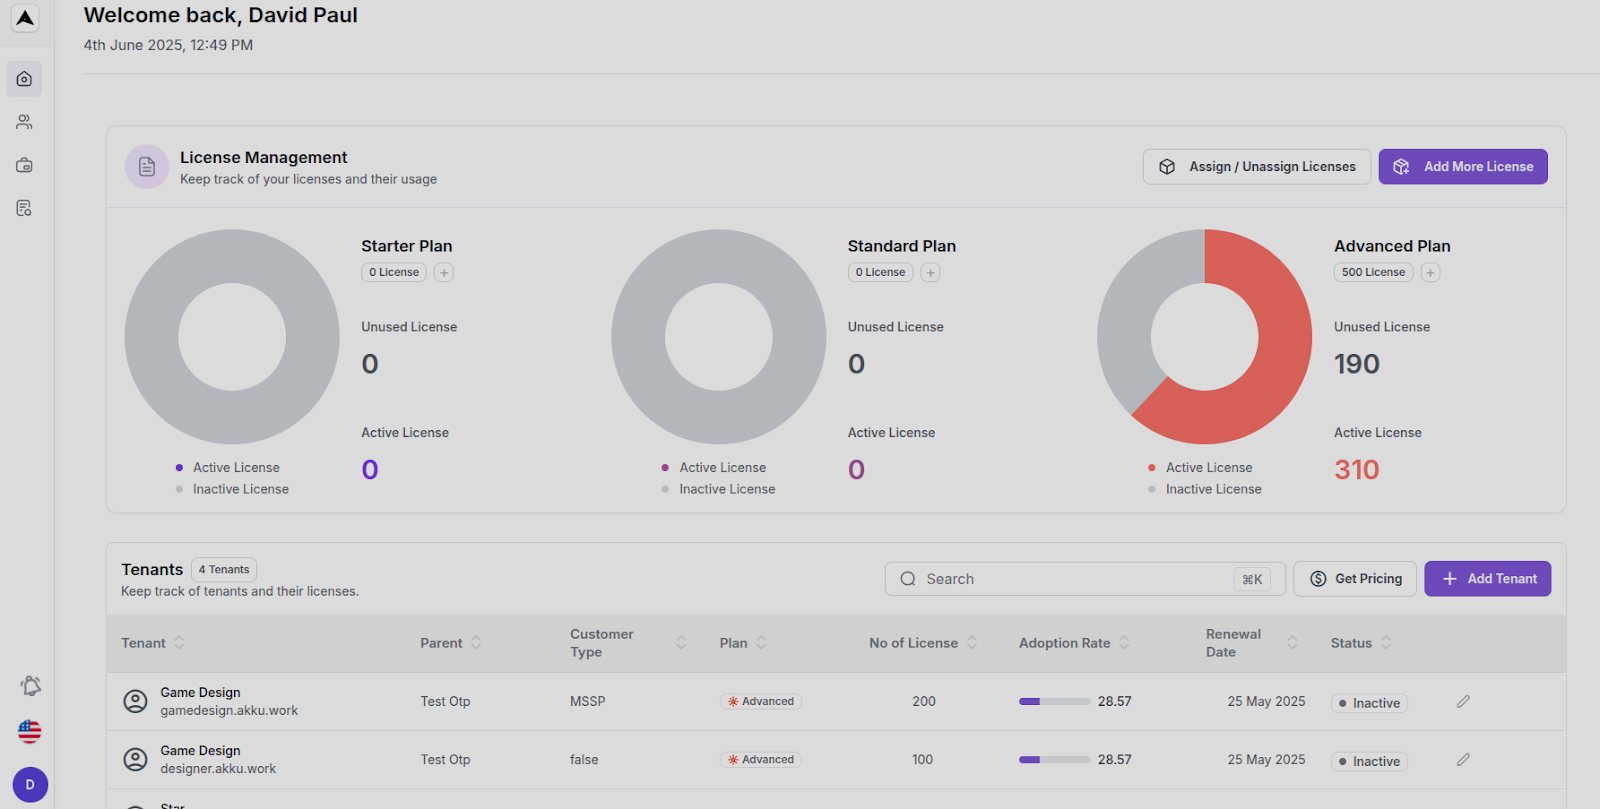
Assign / Unassign Licenses Flow:
- Click Assign / Unassign Licenses
- Enter number of users to assign (dropdown: 0 to 5000+)
- Cost auto-calculates per user/year
- Shows total annual cost to be billed to client
- Click Assign License
Screenshot
Add More Licenses Flow:
- Click Add More License
- Select plan to increase (Starter, Standard, Advanced)
- Choose number of licenses
- Dynamic pricing shown (e.g., ₹3999/user/year)
- Click Buy License
Screenshot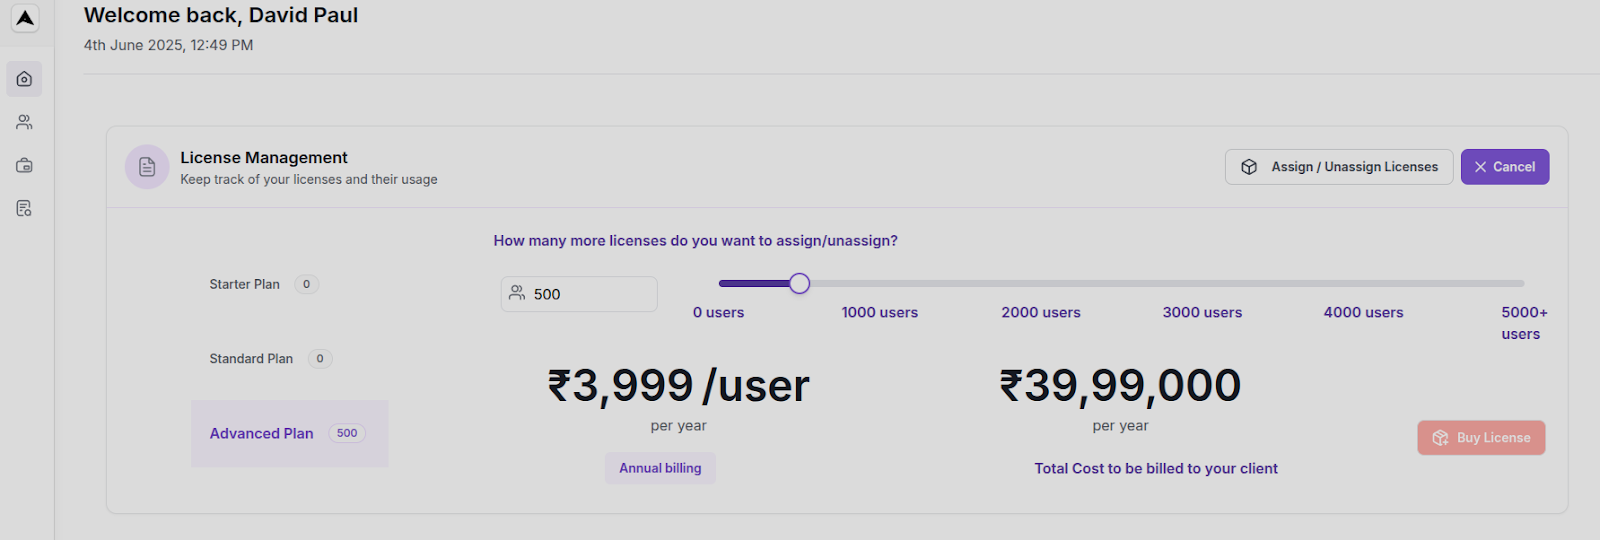
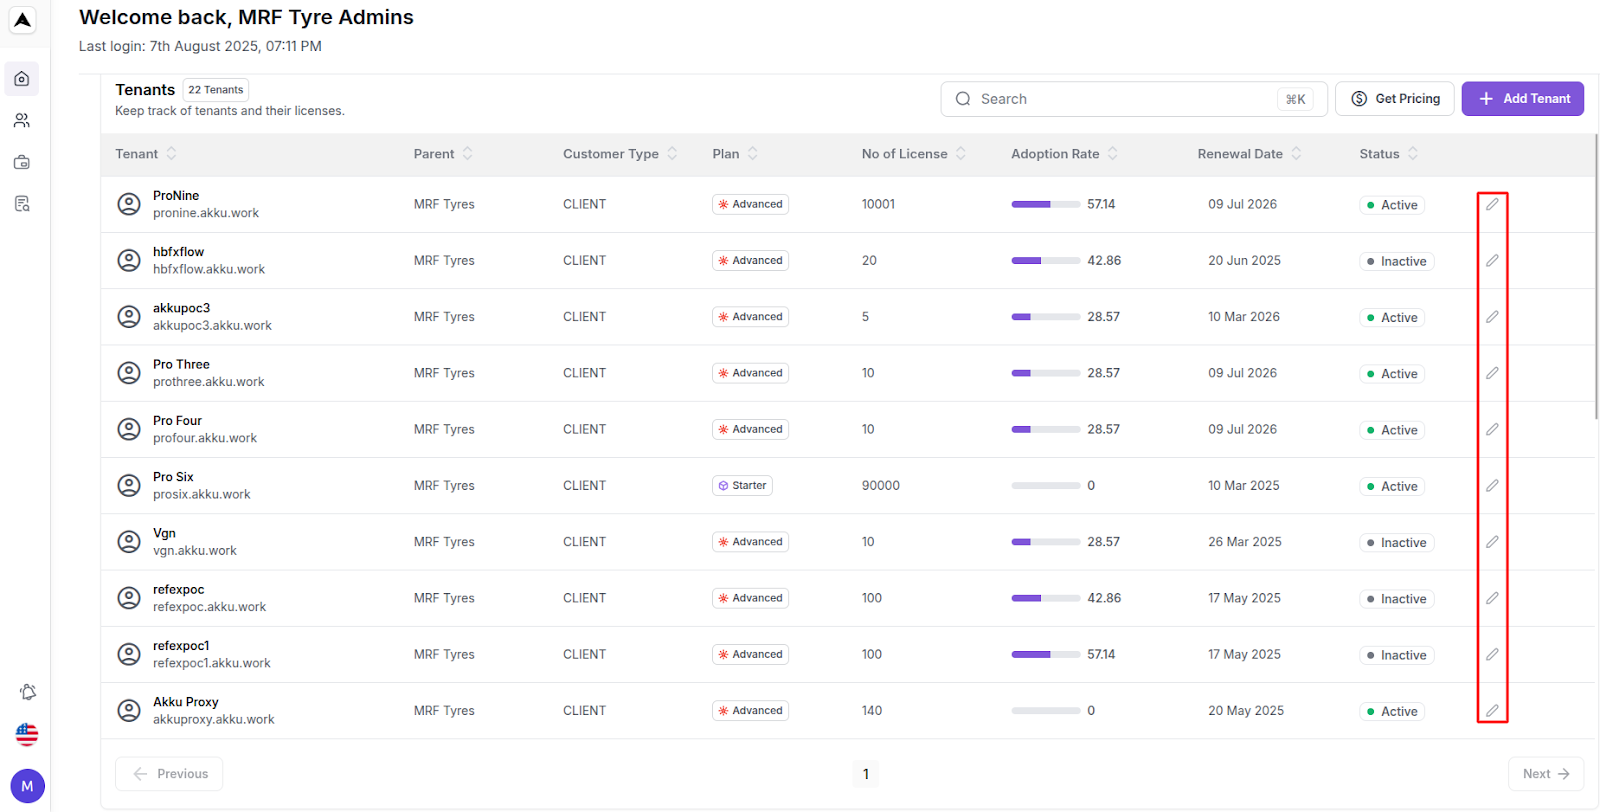
Tenants Section
Overview:
Displays all sub-tenants
Summary: "4 Tenants"
Shows:
- Name
- Domain
- Type (MSP or CLIENT)
- Plan (Starter/Standard/Advanced)
- License Count
- Utilization %
- License Expiry Date
- Status (Active/Inactive)
Screenshot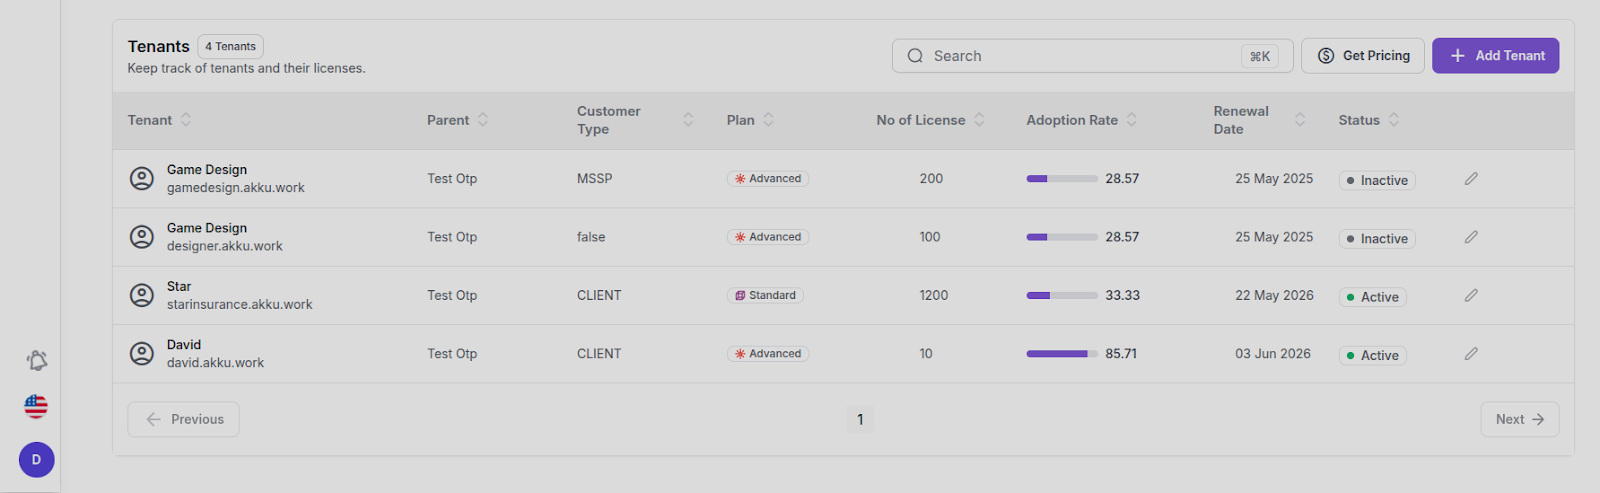
Search & Navigation:
- Search bar with shortcut: ⌘K
- Pagination: Previous / 1 / Next
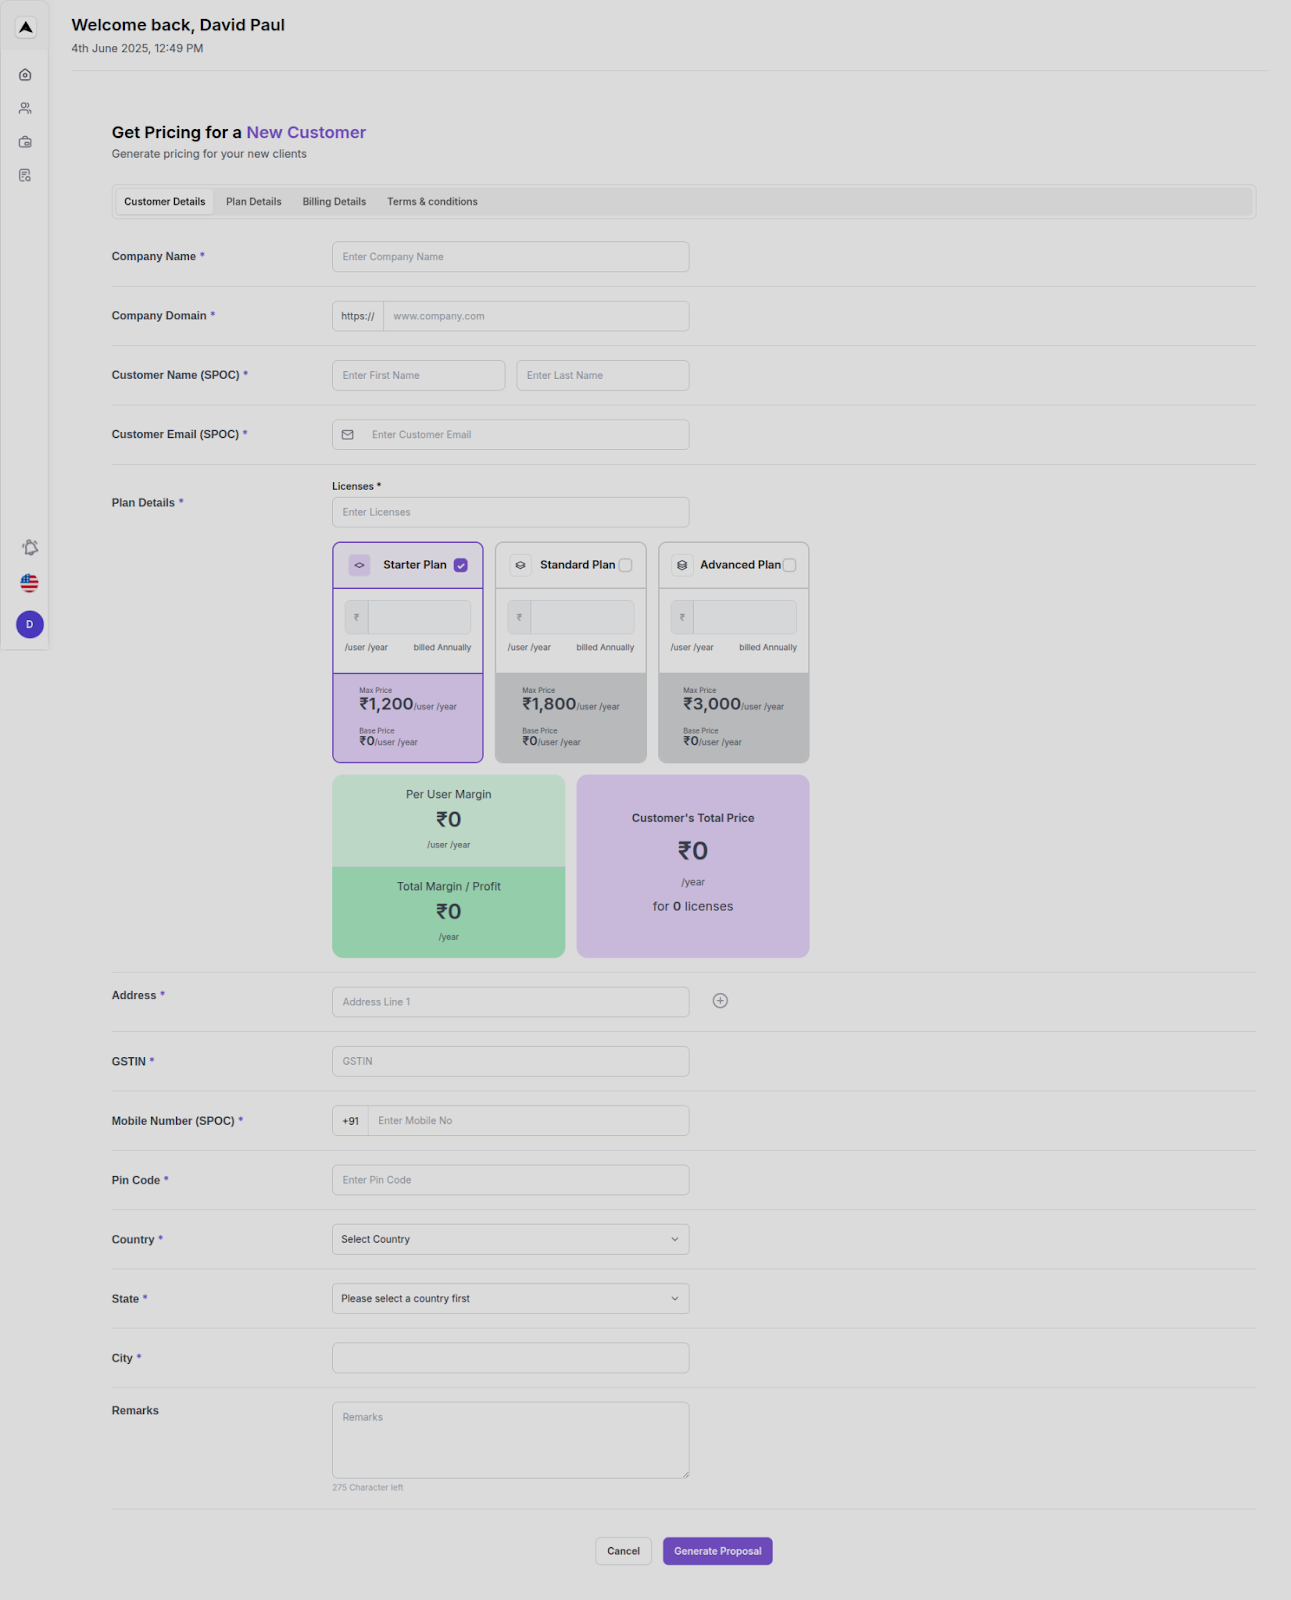
Get Pricing Flow
Click Get Pricing
Fill customer details: Company Name,Domain,SPOC Name,Email
Select plan: Starter, Standard, Advanced
- Input number of licenses
- Dynamic base/max price and margins shown
- Final customer price shown
Fill billing info: Address,GSTIN,Mobile,Pincode,Country/State/City
Add remarks (optional)
Click Generate Proposal
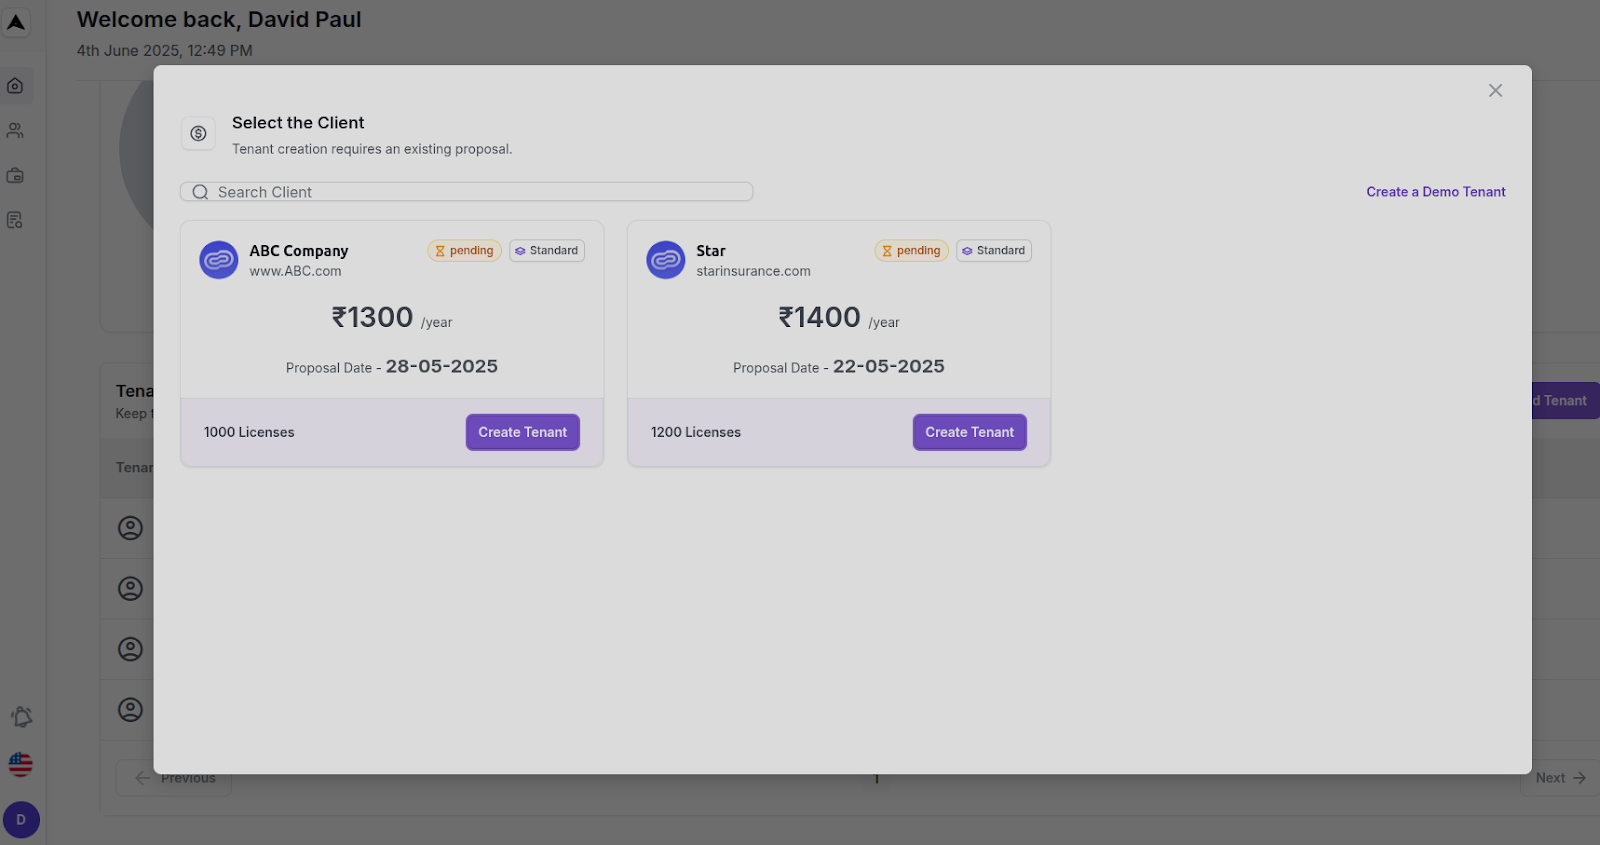
Tenant Creation Flow (Post-Proposal)
Add Tenant Flow:
Click Add Tenant
Modal shows list of clients with proposals
Select a client (pending proposal)
Click Create Tenant
- If "Create Demo Tenant" selected → valid for 30 days
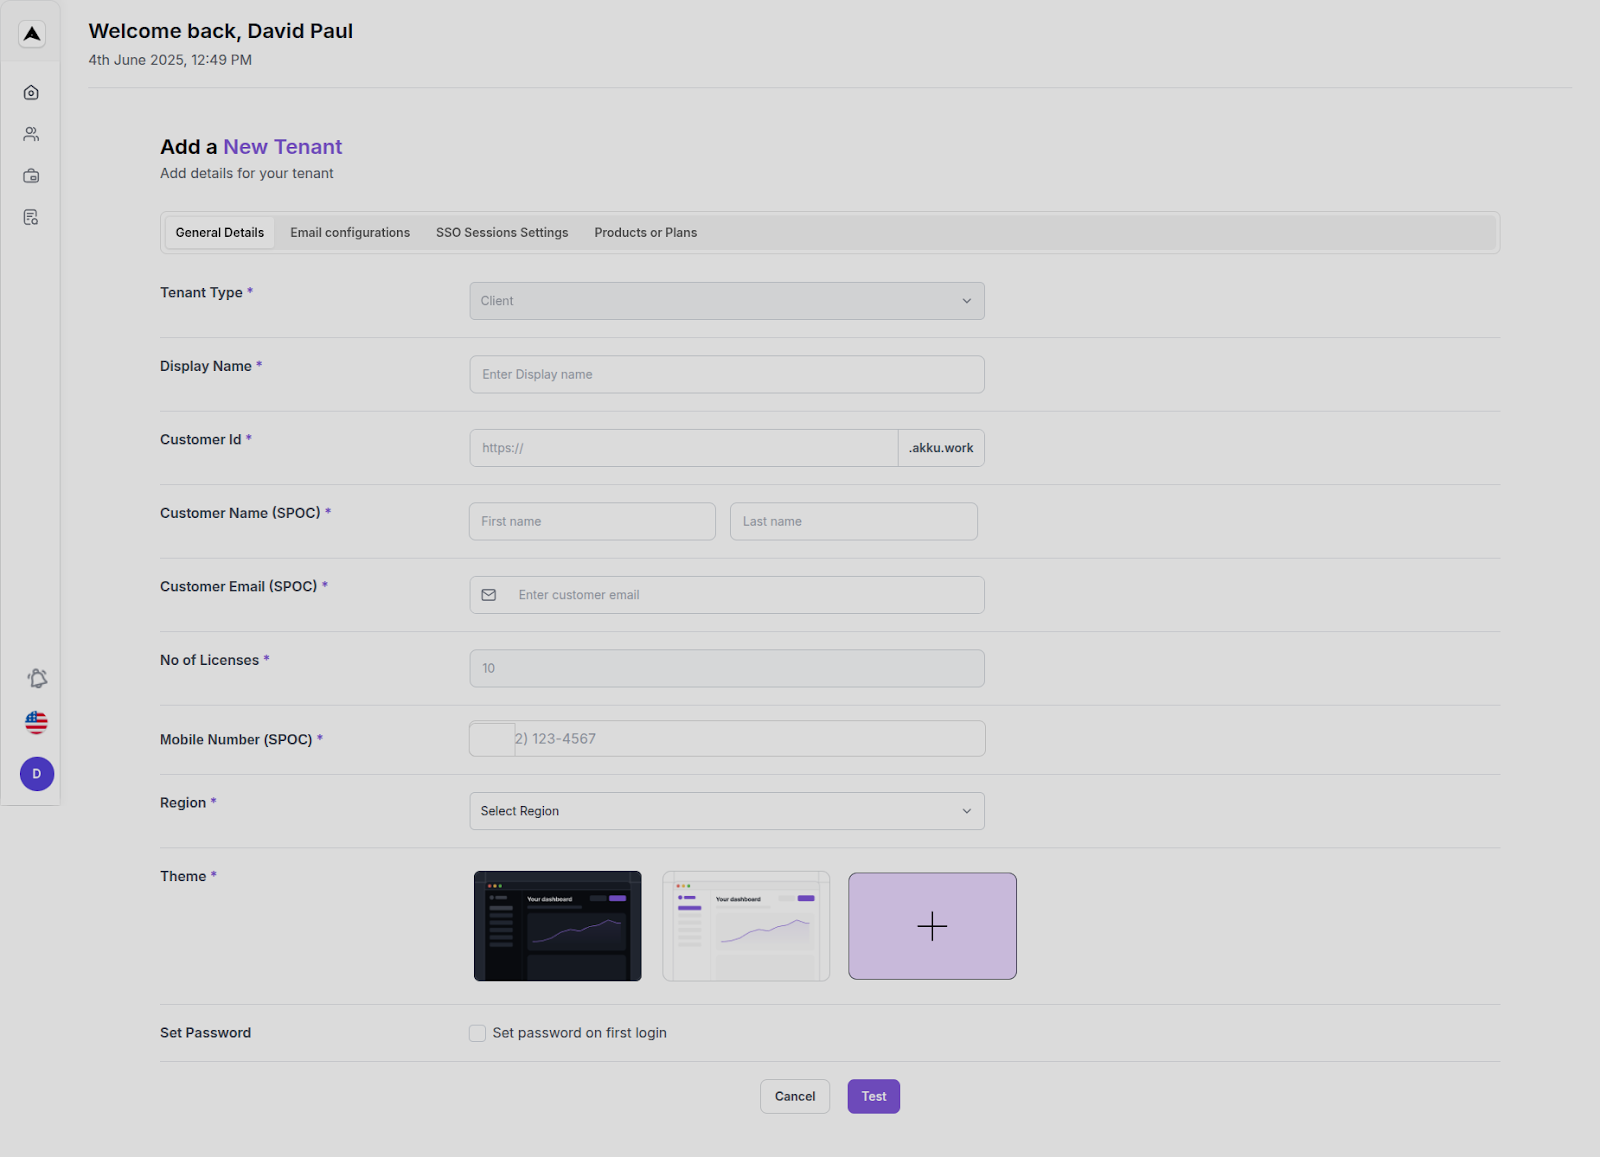
Add a New Tenant (DEMO)
General Details
- Tenant Type: Client
- Display Name, Customer ID (subdomain)
- SPOC Name, Email, No. of Licenses, Region, Theme
- Set password on first login (toggle)
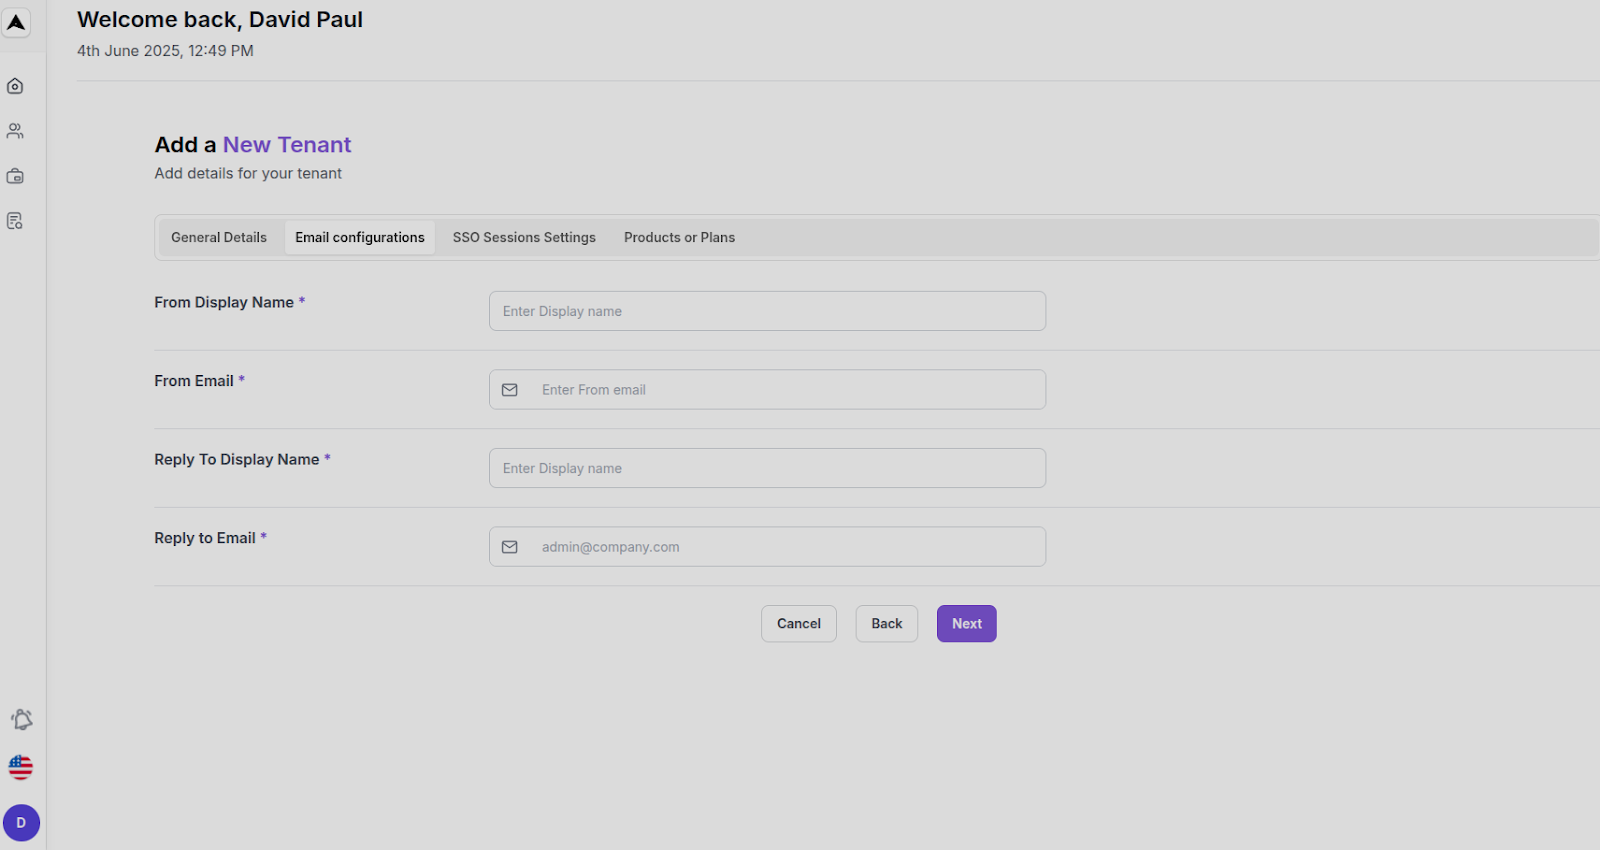
Email Configuration
- From Display Name & Email
- Reply-To Name & Email
SSO Session Settings
- SSO Idle & Max Times (with “Remember Me” options)
- Login Timeout
- Bot Detection toggle

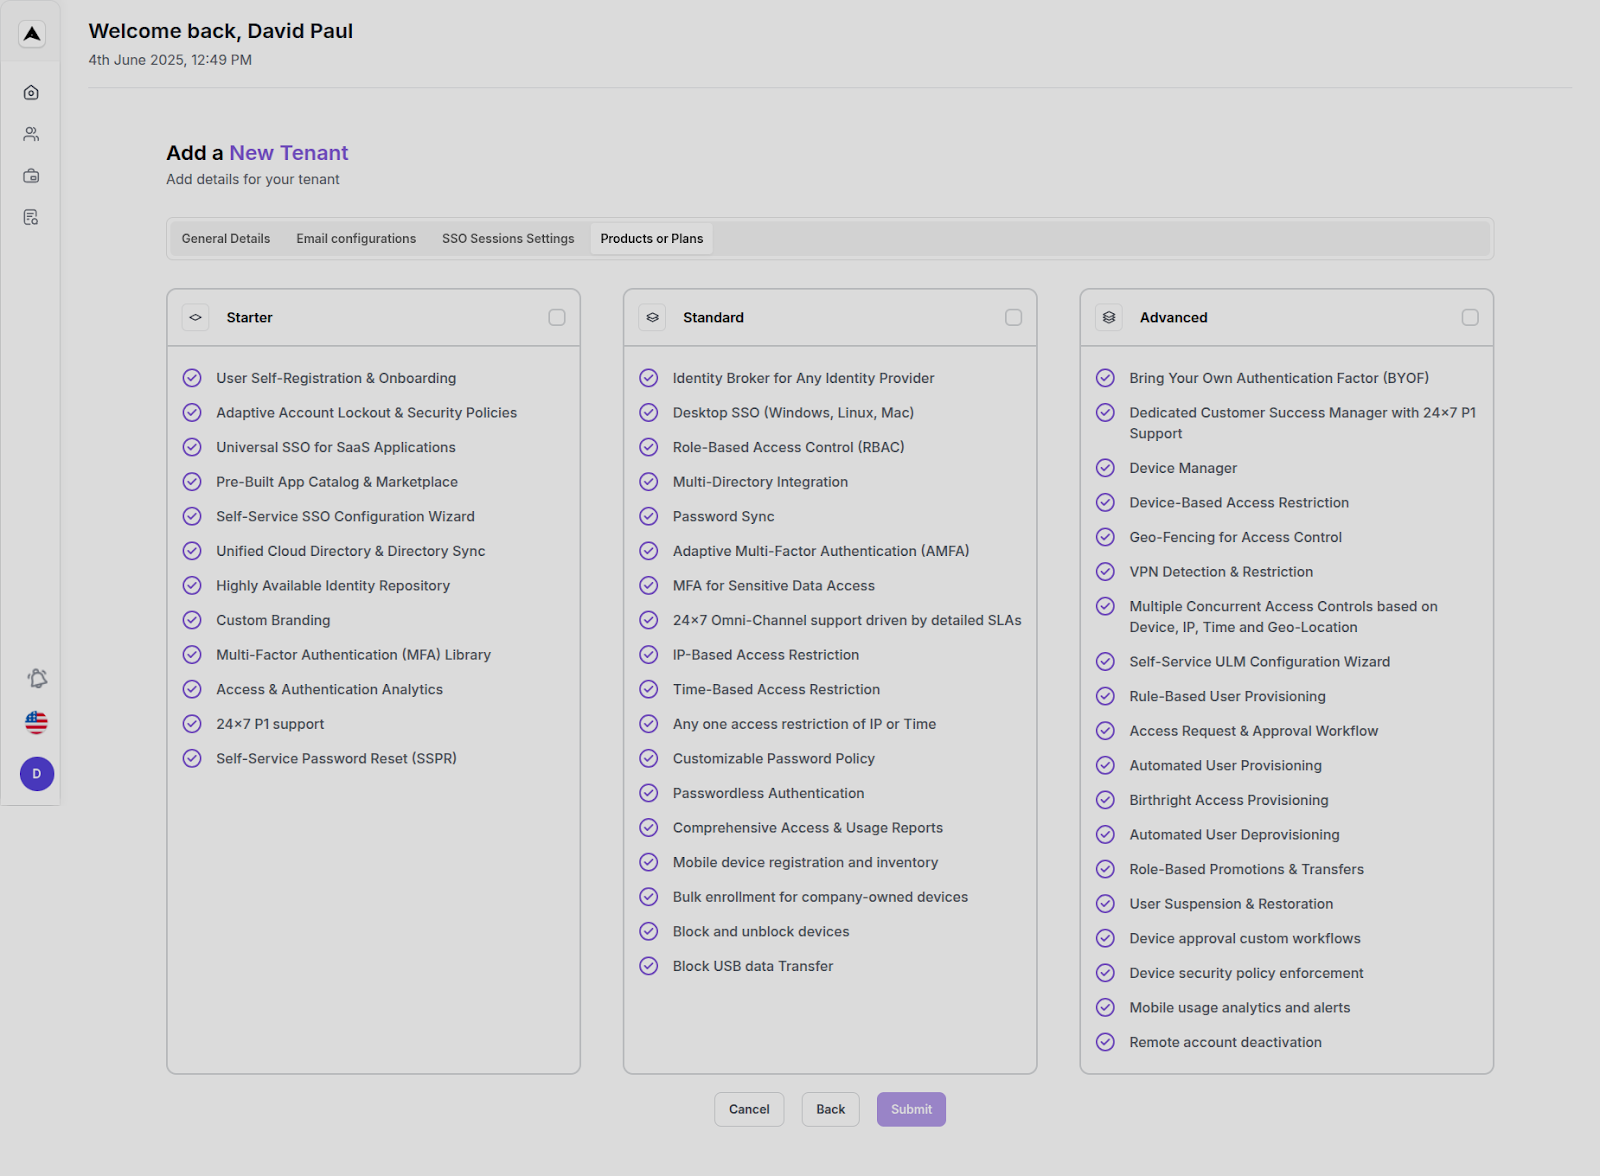
Product or Plan
- Select Plan: Starter / Standard / Advanced
- Click Submit
Final Step
- Confirmation mail sent to user
- User sets password and gets access
- Demo tenants expire in 30 days
End-to-End Workflow Summary
- Admin lands on Smart Analysis → Overview of licenses & tenants.
- Can assign or buy licenses for various plans.
- Can create tenant from a proposal, or launch demo tenants.
- Each tenant gets full configuration settings: general, email, session, product.
- Pricing & billing structured per plan with profit margins calculated.
- Admin maintains strict separation between MSP (management) and client (usage).
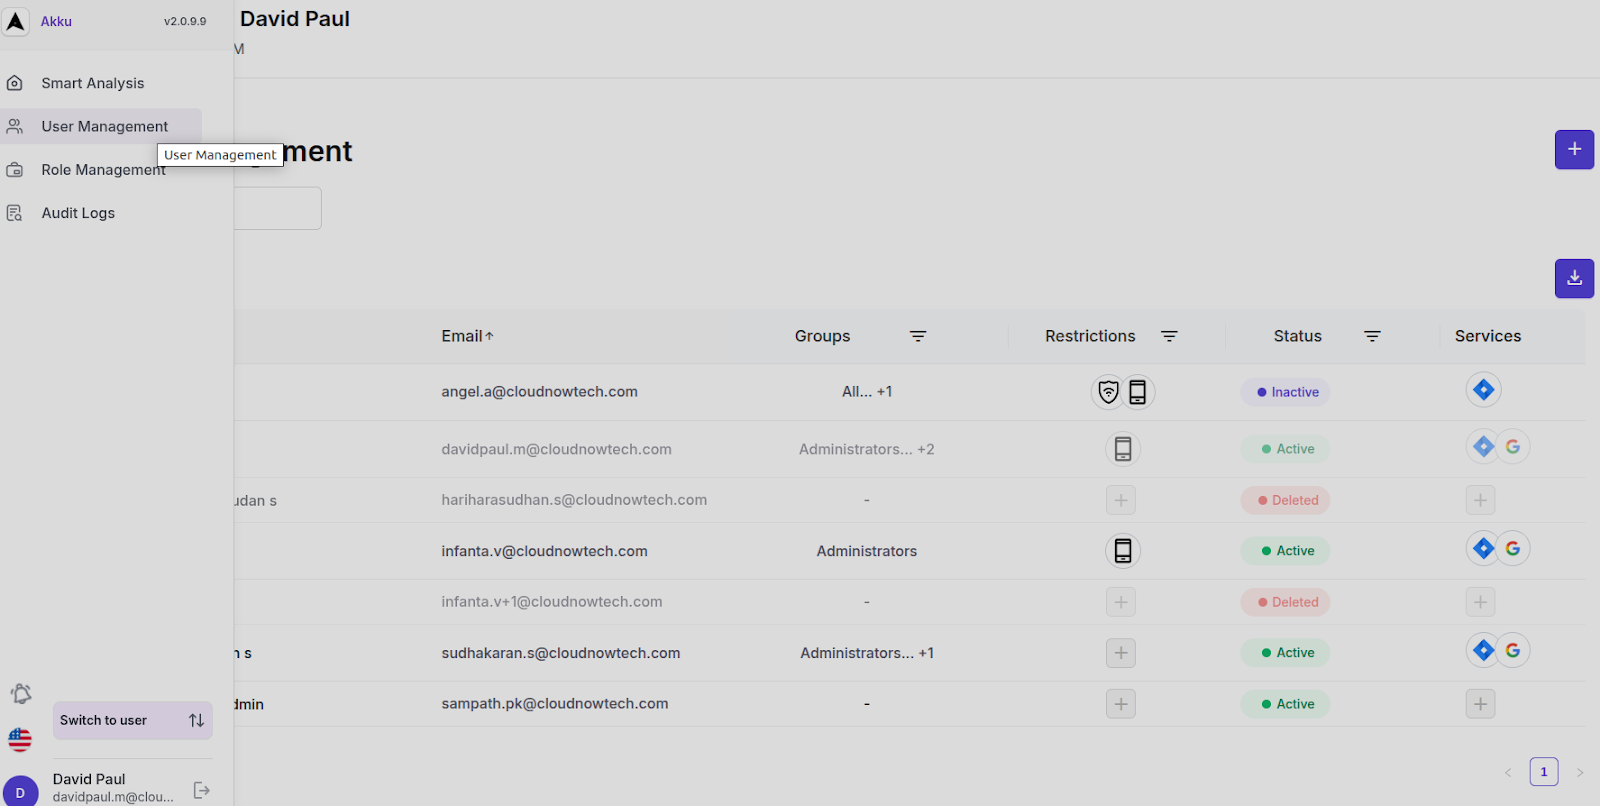
MSSP Dashboard – User Management Workflow
Navigation Path
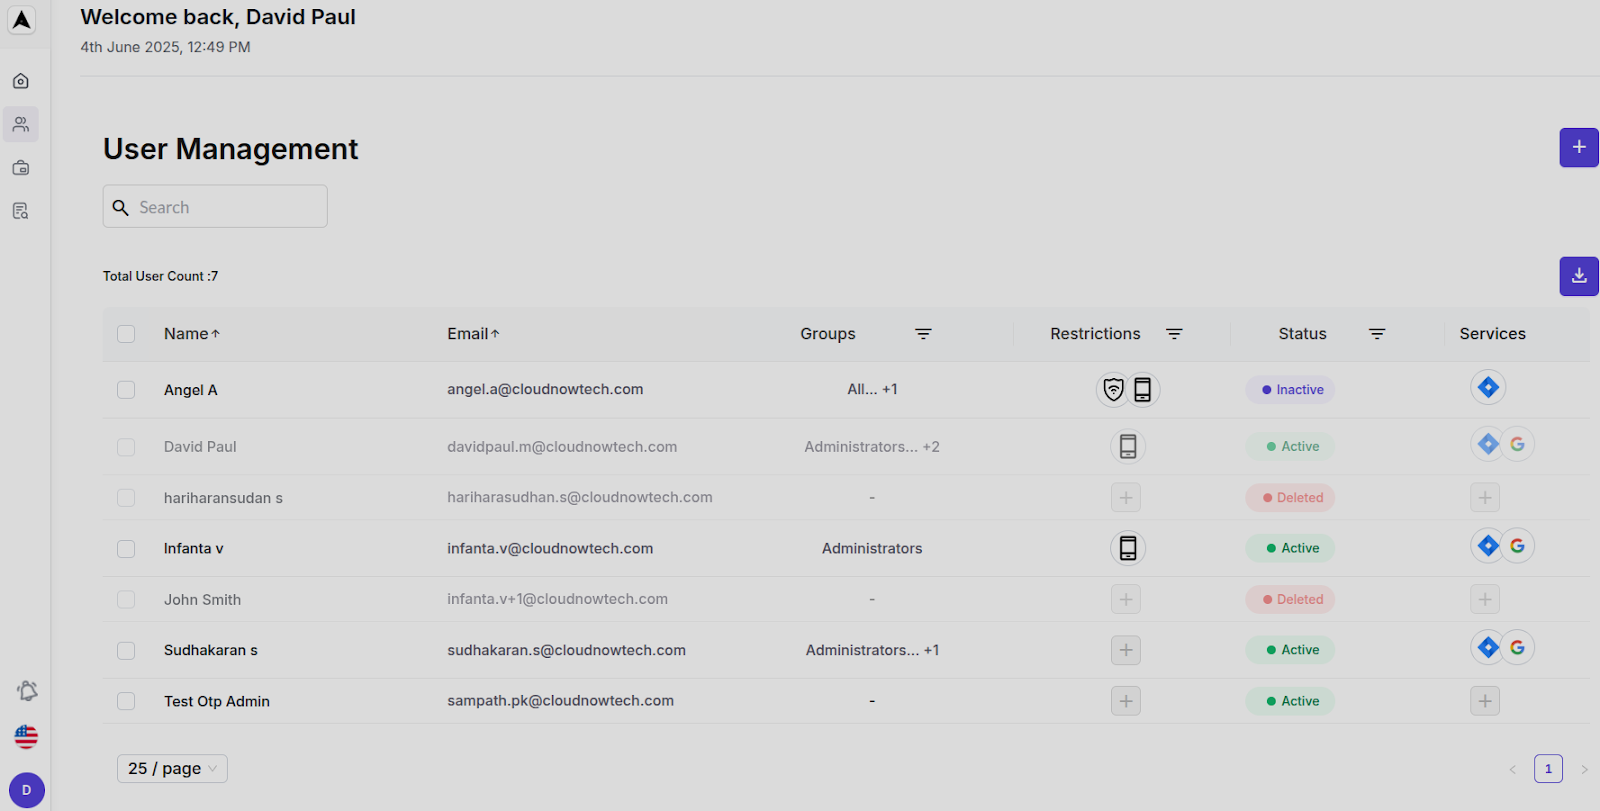
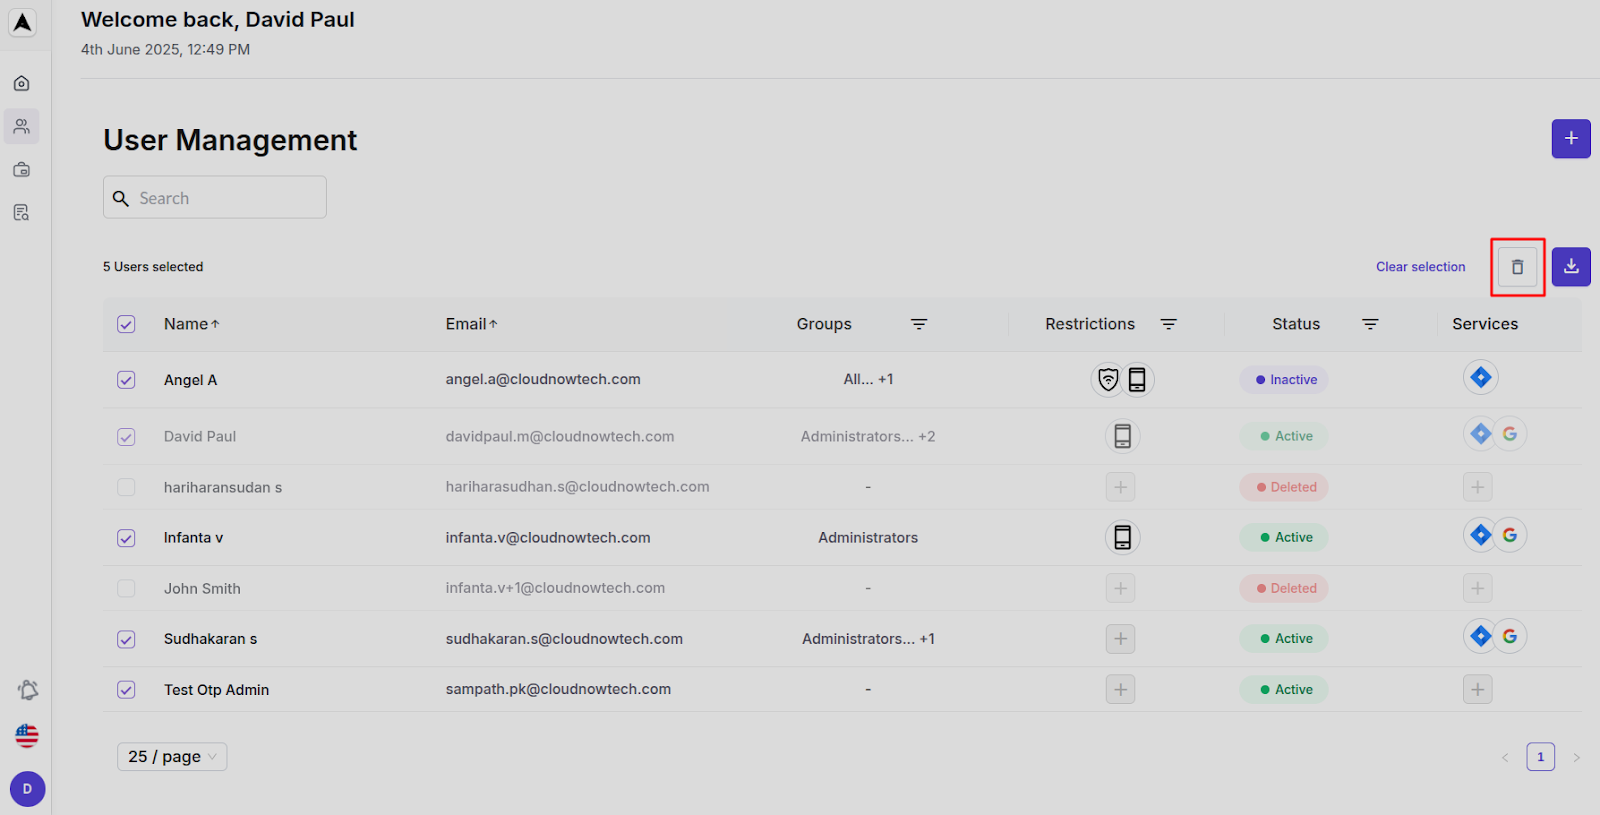
Dashboard Overview
Search bar: Filter users by name/email 🔍
Total User Count : 7
User Table Columns:
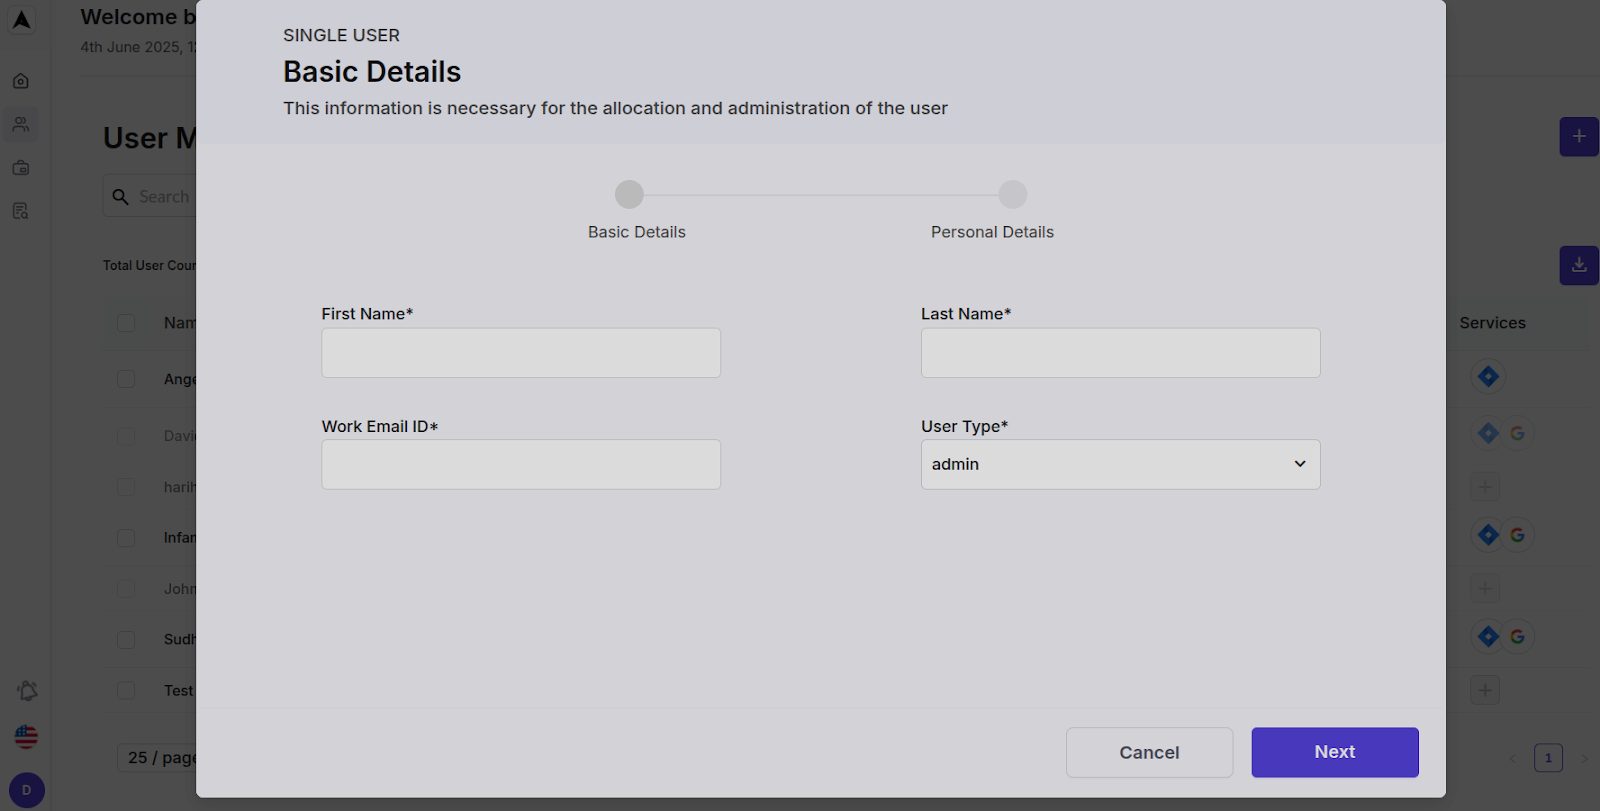
Add User Flow
Basic Details (Tab 1)
- First Name *
- Last Name *
- Work Email ID *
- User Type * (Dropdown)
Navigation Path
Personal Details (Tab 2)
- Mobile Number *
- Email ID * (may be auto-filled from step 1)
- Custom Fields (optional)
User can edit, add, or rename custom fields.
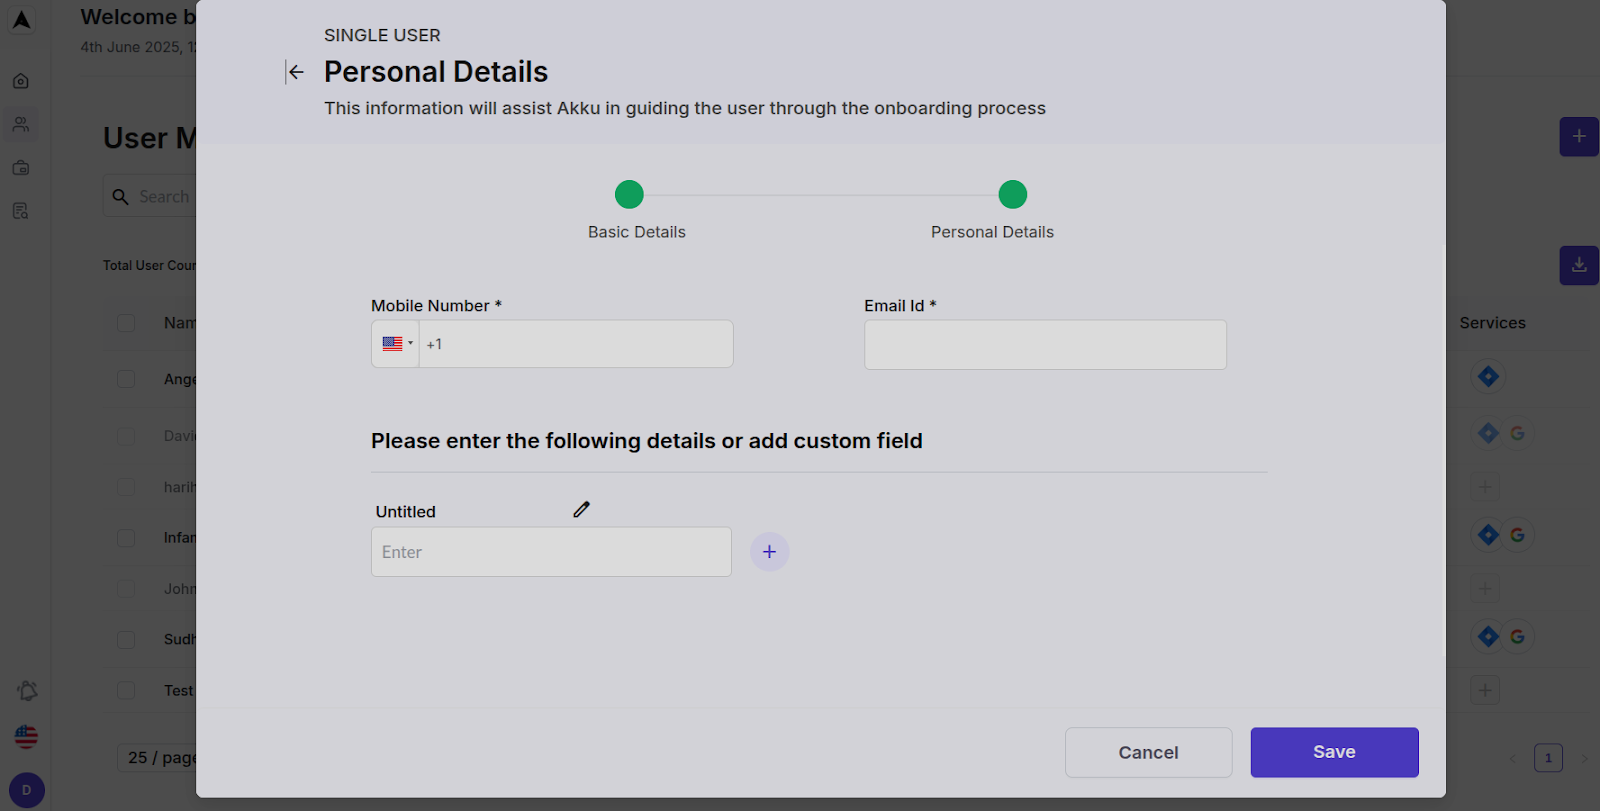
Actions:
- Cancel
- Save (User will be added to user list)
Post-Save Behavior
- New user appears in the user table.
- Associated group(s), status, and restrictions get updated dynamically.
- If assigned to deleted state (soft delete), status is set to “Deleted.”
- System auto-calculates updated Total User Count.
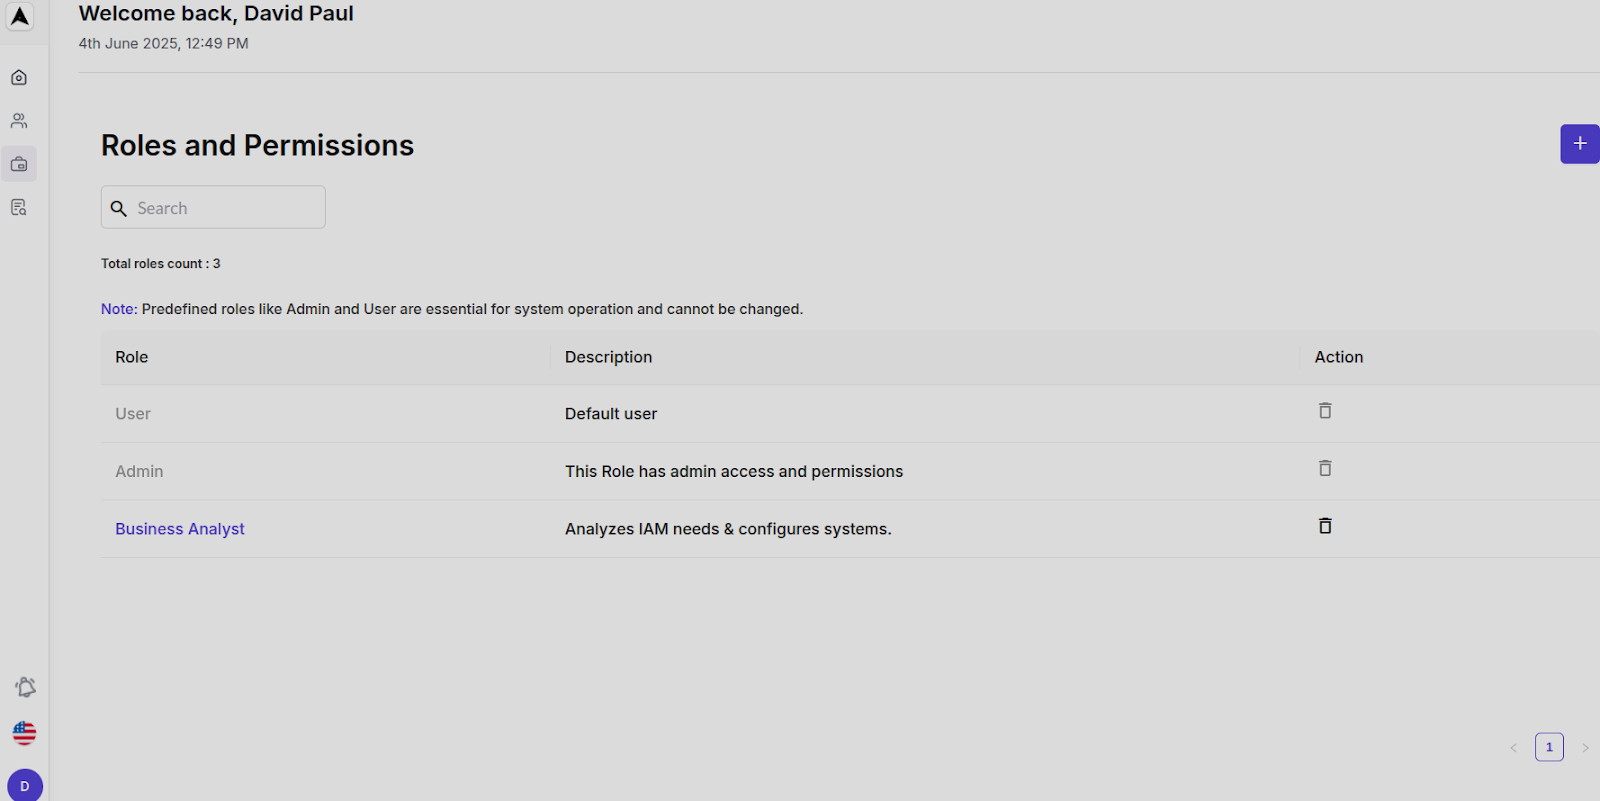
Role Management Workflow
Navigation Path
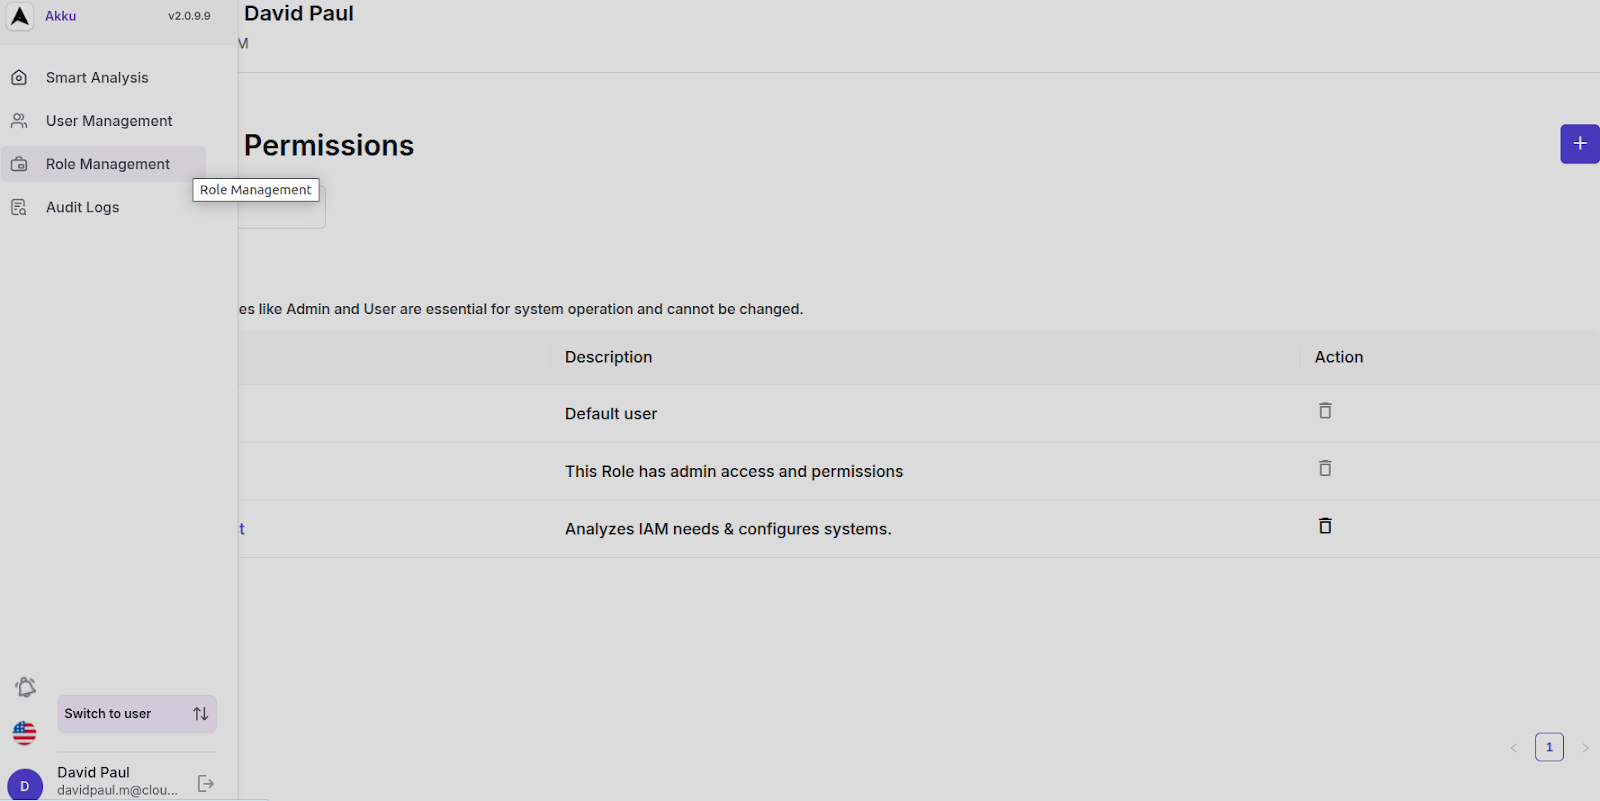
Overview
- Search bar to filter roles
- Total Roles Count: 3
Predefined Roles (Immutable):
| Role | Description | Action |
|---|---|---|
| User | Default user | ❌ Delete disabled |
| Admin | Full admin access and permissions | ❌ Delete disabled |
| Business Analyst | Analyzes IAM needs & configures systems | ✅ Delete |
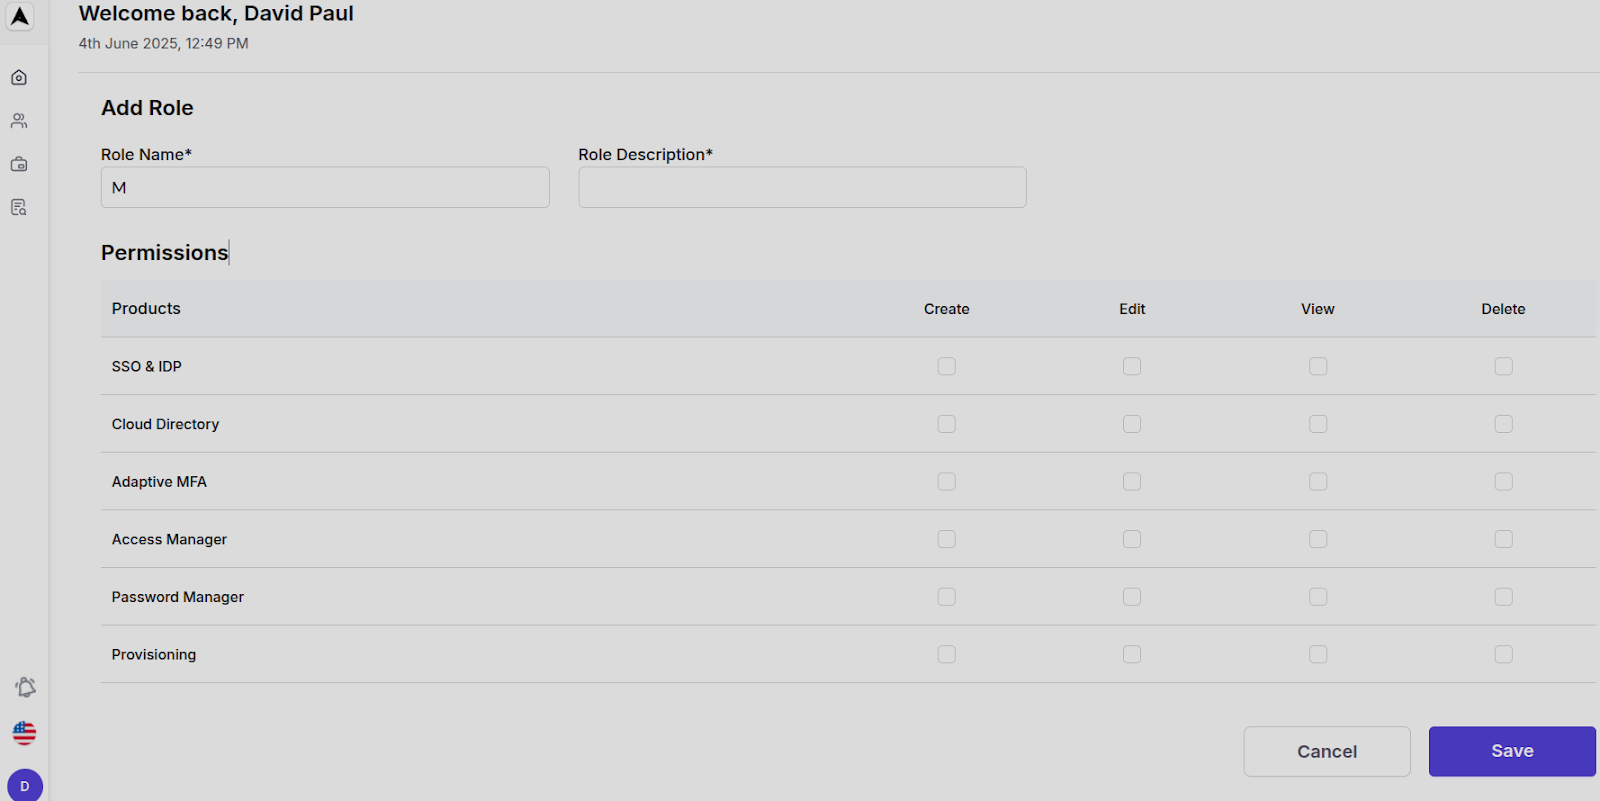
Add Role Flow
Click Add Role
Enter:
Role Name*
Role Description*
Select Permissions(across products):
Create, Edit, View, Delete for each product:
- ✅ SSO & IDP
- ✅ Cloud Directory
- ✅ Adaptive MFA
- ✅ Access Manager
- ✅ Password Manager
- ✅ Provisioning
Click Create to finalize the new role.
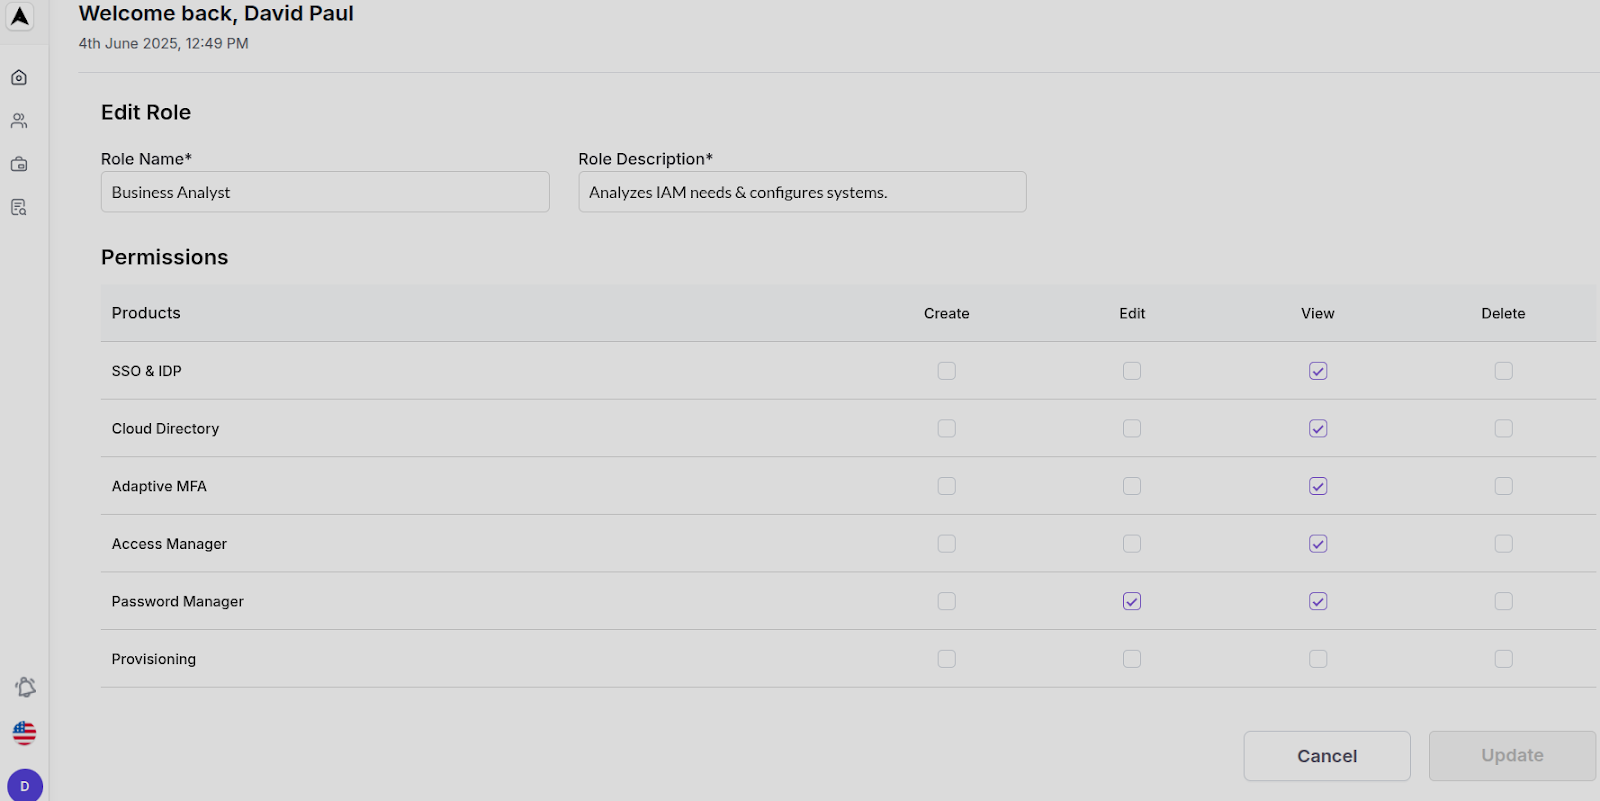
Edit Role Flow
Click on a Role (e.g., Business Analyst)
Modify Role Name and Description
Update Permissions (CRUD operations across products)
Click Update or Cancel
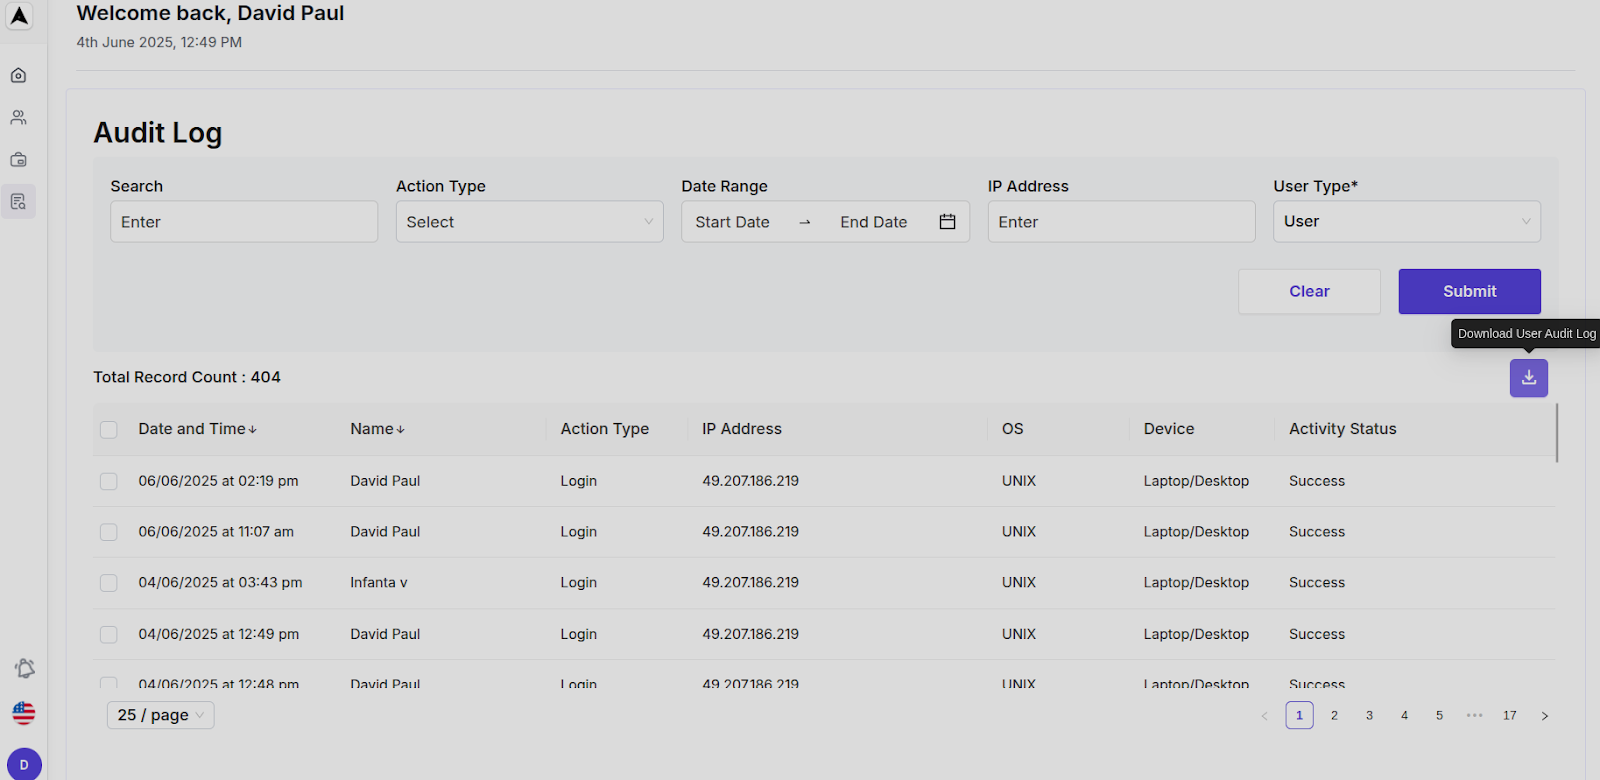
Audit Logs Workflow
Navigation Path
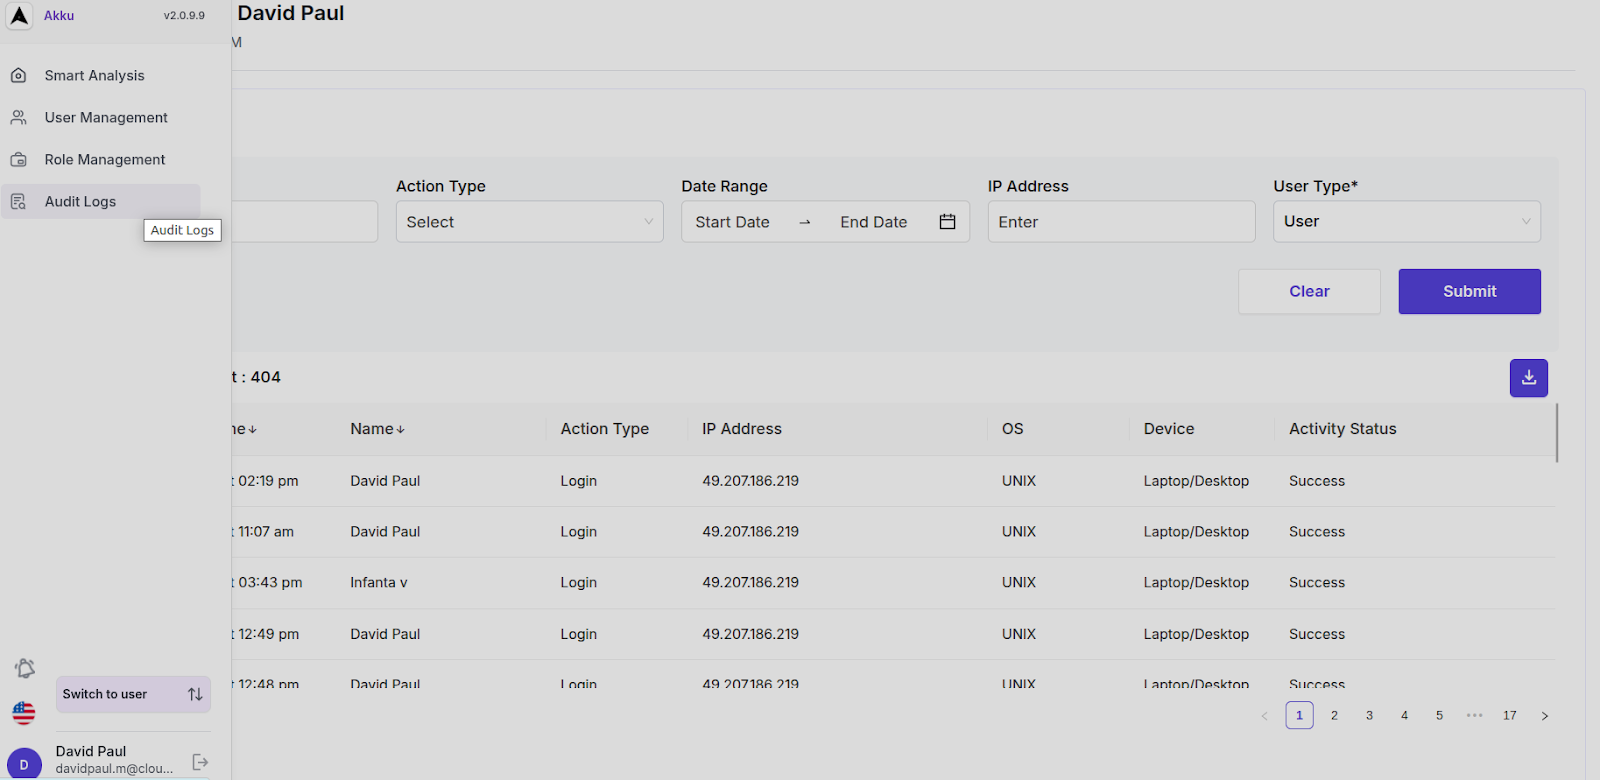
Overview
View logs of all user/system actions
Filter Options:
Action Type (Dropdown)[login,user update,Logout,Profile Update,Forgot password,Forgot username,Set Password,Account Disabled,Change password,Suspecious,Idle Session timeout and MDM]
Search (Enter)
Date Range (Calendar)
IP Address
User Type (User/admin)
Log Table Columns:
When filters are applied and Submit is clicked:
- Matching audit logs are displayed
- Option to Download logs (CSV/PDF)
Top Navigation Bar Features
| Element | Function |
|---|---|
| 🔔 Akku Notifications | Latest system alerts (currently: "No records found") |
| 🆔 Version Info | v2.0.9.9 |
| 👤 Switch to user | Toggle between MSP view and user view |
| 👤 Profile Icon | Shows (admin identity) |
| 🌐 Language Selector | Change UI language |
| ⚙️ Admin Controls | Quick access to account settings, logout, etc. |