SSO for SalesForce
Overview
Akku, developed by CloudNow Technologies, is a robust Identity & Access Management (IAM) solution designed to streamline user provisioning, access management, and activity monitoring throughout the user lifecycle. It offers administrators the tools to efficiently manage user privileges and ensure data security in cloud environments. With Akku, organizations can confidently embrace cloud technology while maintaining compliance with standards and regulations. Its comprehensive features enable seamless onboarding, secure authentication, a single point-of-access to all applications, enforcement of access policies, and monitoring of user activity to detect and respond to security threats effectively while enhancing the user experience significantly. By prioritizing data security, privacy, and compliance, Akku provides users with peace of mind while improving overall productivity. With its flexible and scalable architecture, Akku is well-equipped to meet the evolving needs of modern organizations in managing their identity and access requirements.
Introduction
SalesForce SAML with Akku provides a secure and reliable method for authenticating users. To set it up, you'll need a SalesForce account, an Akku account, and the SAML Integration feature enabled. First, configure your Akku instance by adding the SalesForce SAML app and specifying the required fields. Then, grant Akku permission to access your SalesForce domain. Next, set up the SAML request URL and authentication URL in your Akku instance. Finally, test your integration to ensure seamless authentication for your users.
Configure SalesForce Settings
The steps listed below provide instructions on Adding the Application app from the QuickLaunch App Store and configuring SAML SSO to the added Application app.
Generate Akku Metadata
Log in to IDP (Akku) as an administrator. Go to App Management, in the available apps choose 'SalesForce' and click on Configure. Here, generate the SAML metadata file by navigating to Integration tab.
Login to SalesForce
Login into the SalesForce admin account.
Open Advanced Setup
In the quick settings menu, click 'Open Advanced Setup', which will open the setup page.
Search Single Sign-On Settings
In the search bar search for “Single Sign-On Settings". Which will appear under the Identity.
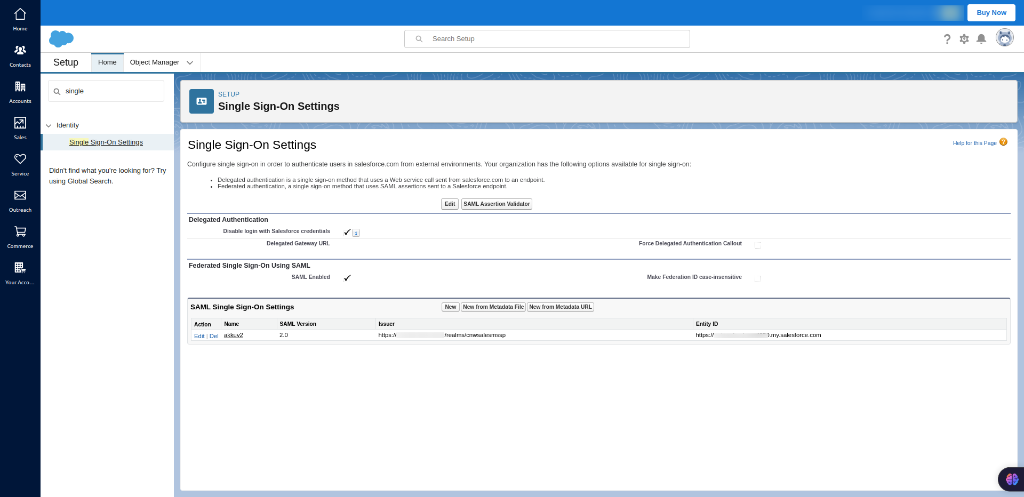
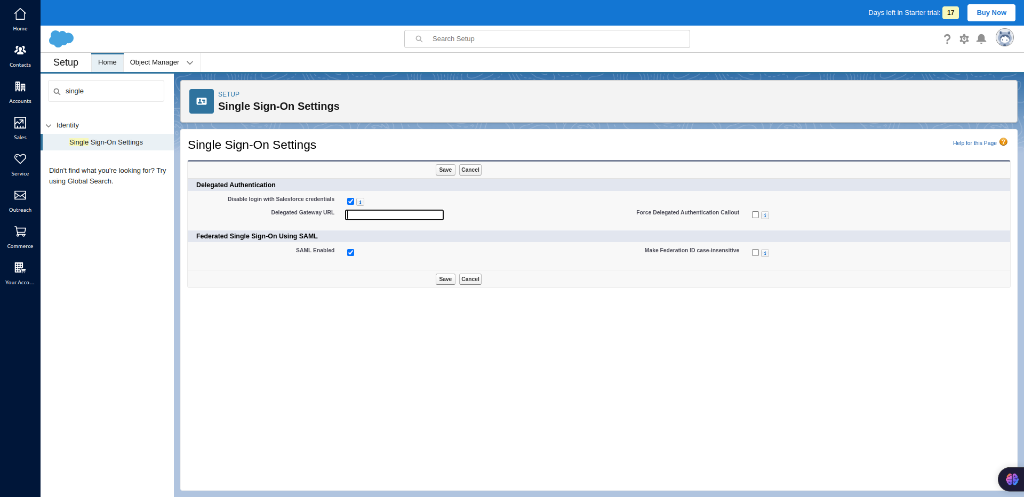
Enable SAML
Now click on the Edit button which will take you to the SAML configuration page. In there check the SAML Enabled and Disable login with Salesforce credentials with tick. Then save the changes.
New from Metadata File
After saving the page will be redirected to step 4. In there select the “new from metadata file” which comes under the ”SAML Single Sign-On Settings”. which takes you to the pages shown below. In here upload the metadata file which you downloaded from the IDP(Akku).
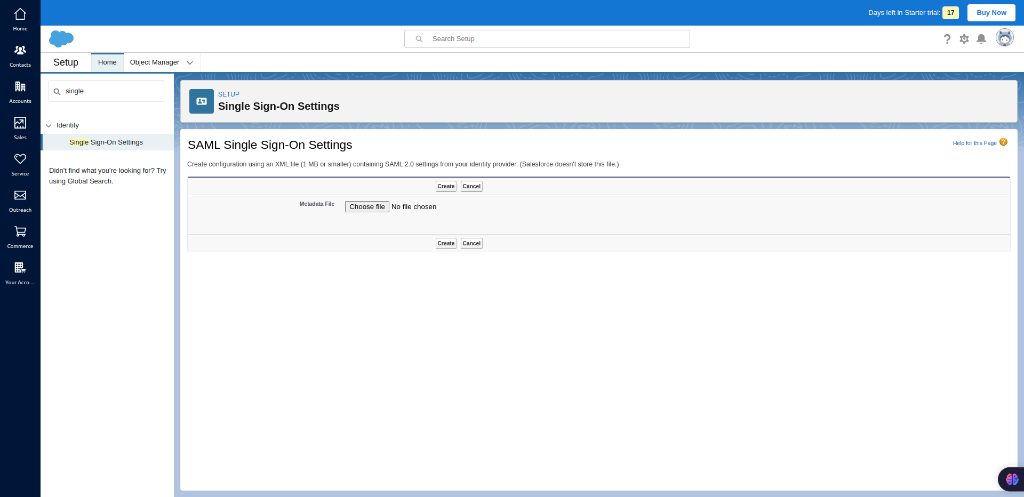
Upload Metadata
After uploading the IDP(Akku) metadata file you will be redirected to the page shown below.
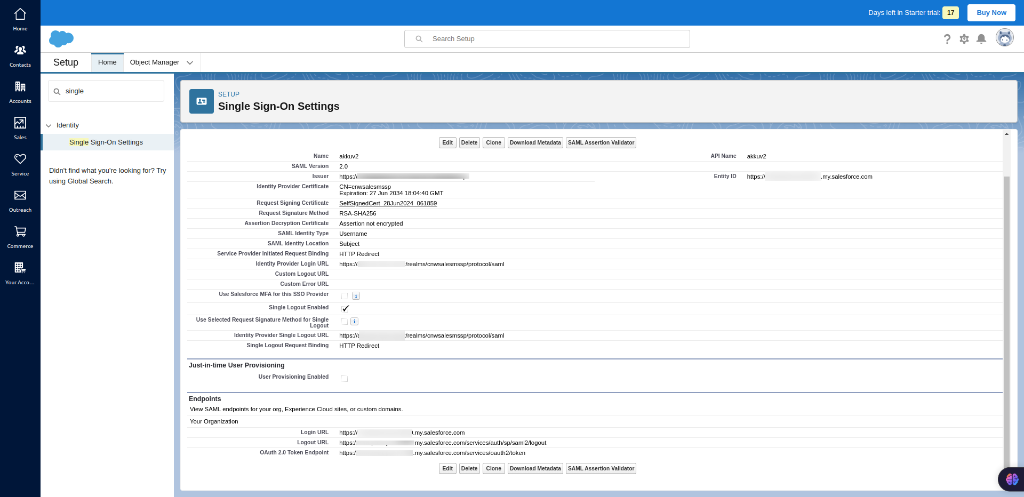
Verify Settings
The URL retrieved from the metadata will be automatically populated in the SAML Single Sign-On Settings page.
Download SalesForce Metadata
Select the “Download metadata” in the SAML single sign-on settings. Then the metadata of the SP(salesForce) will be downloaded.
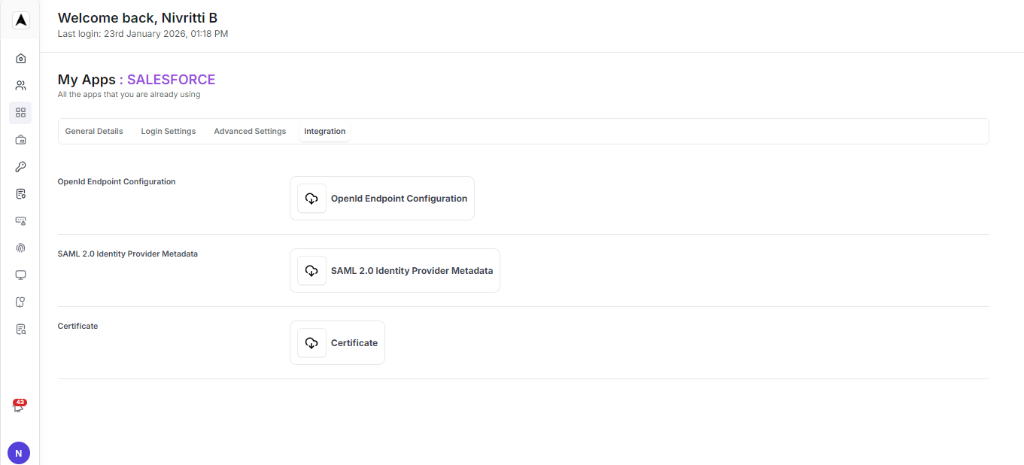
Configure Akku Settings
Configure Akku with the metadata downloaded from SalesForce.
Login to Akku
Login to IDP (Akku) as an administrator. Go to App Management, in the available apps choose 'SalesForce' and click on Configure. This step is similar to step 1.

Fill Configuration
In the “Configuring SALESFORCE” tab. Fill the General, Login, and Advance Settings with the data in the metadata file that is downloaded from the SP(salesForce).
Client ID: https://enterprise-java-4050.my.salesforce.com
Home URL: https://enterprise-java-4050.my.salesforce.com
Valid redirect URL: https://enterprise-java-4050.my.salesforce.com
Valid redirect Logout URL: https://enterprise-java-4050.my.salesforce.com/services/auth/sp/saml2/logout
Master SAML Processing URL: https://enterprise-java-4050.my.salesforce.com
Assertion Consumer Service POST Binding URL:
https://enterprise-java-4050.my.salesforce.com
Assertion Consumer Service Redirect Binding URL :
https://enterprise-java-4050.my.salesforce.comVerify URLs
After configuring the URL’s in the “Configuring SALESFORCE” tab. It seems to look something like the image below.

Save Configuration
Click “SAVE” to complete the configuration.
Enable SSO for Users
Configuring Salesforce Settings to Enable Single Sign-On (SSO) for Users
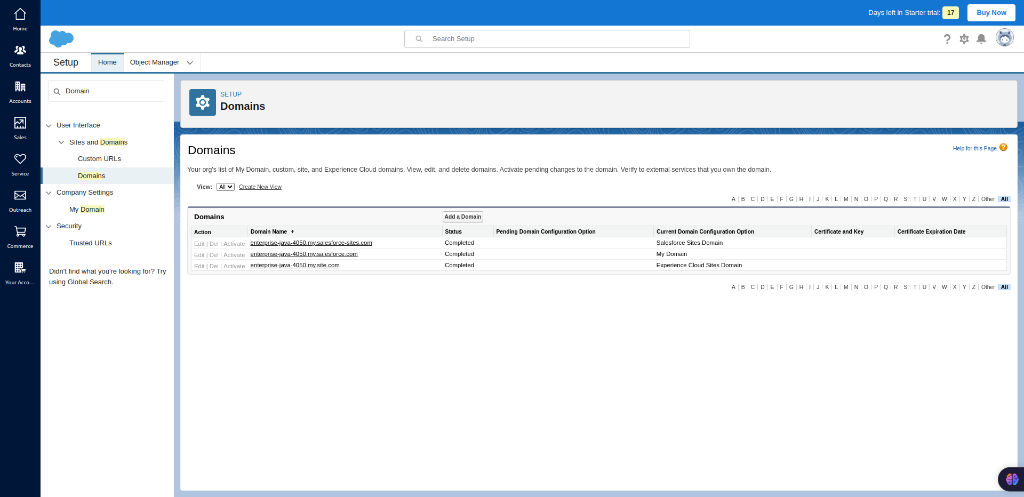
Setup Domains
Follow steps 2 & 3 to enter the “SETUP” page in the salesForce. Once entered, search for “Domain” and select the one that appears under the User Interface -> Sites and Domains -> Domains. After selecting, the Domains will be displayed on the page.
My Domain Settings
Select “my domain” which in the second refers to the image that I’ve attached. Then the My Domain Settings page will appear.
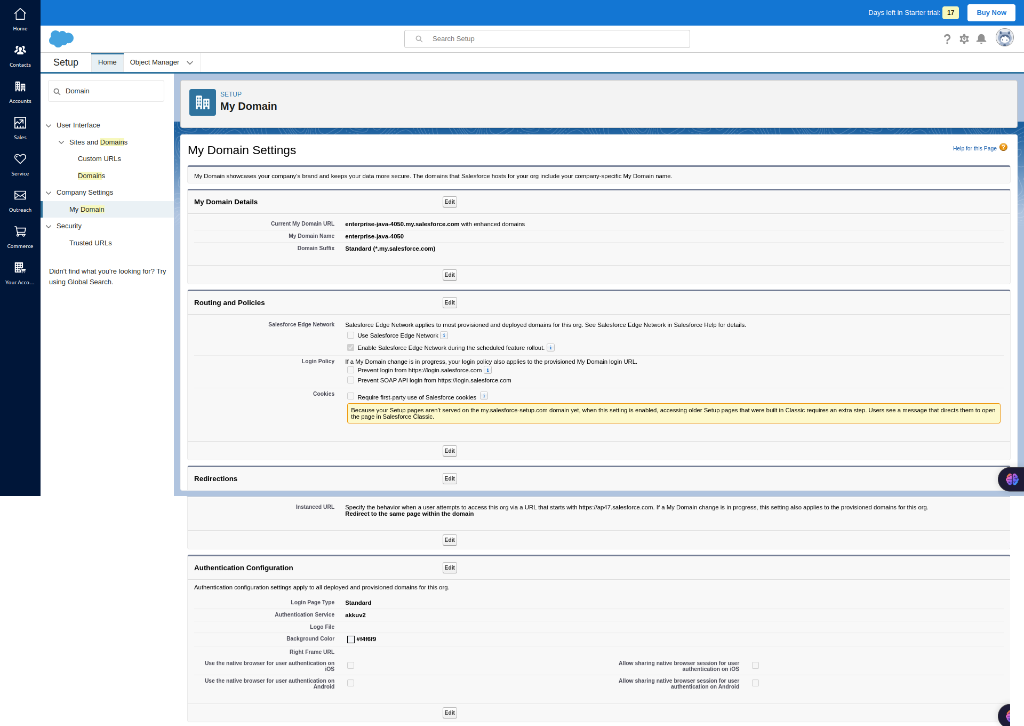
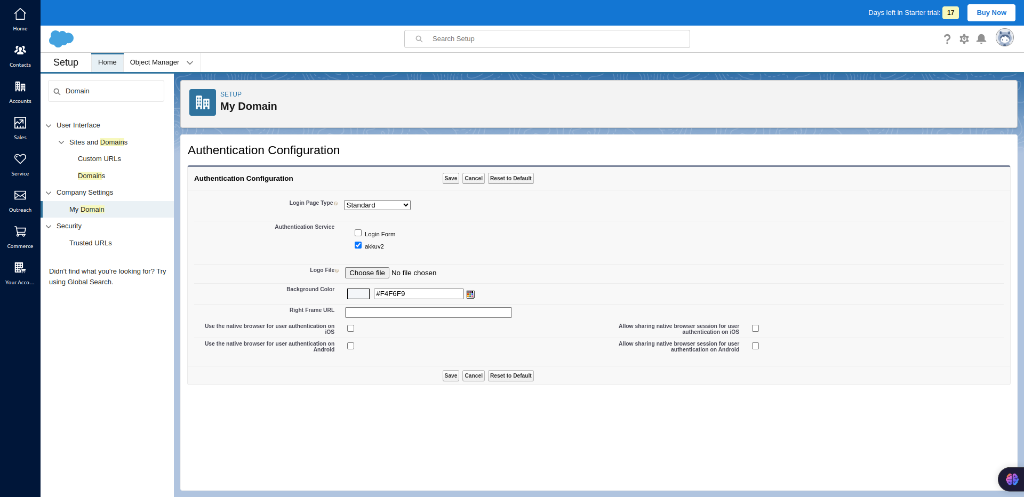
Authentication Configuration
Then at the bottom select the “EDIT” button which comes under the ”Authentication Configuration”. Then you will be redirected to the ”Authentication Configuration” settings page in there select the Authentication Service. There you will have the default (Login Form) authentication service and the custom (akkuv2) service that you have configured. Once selected click the “save” to save the changes.
Manage Users
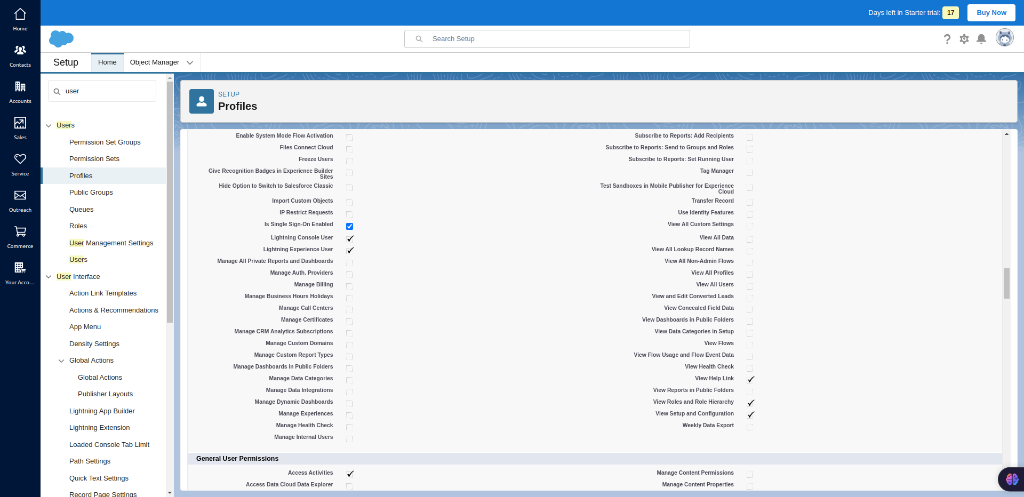
Search for “Users” in the search bar and select the “Profile”. Users -> Profile.
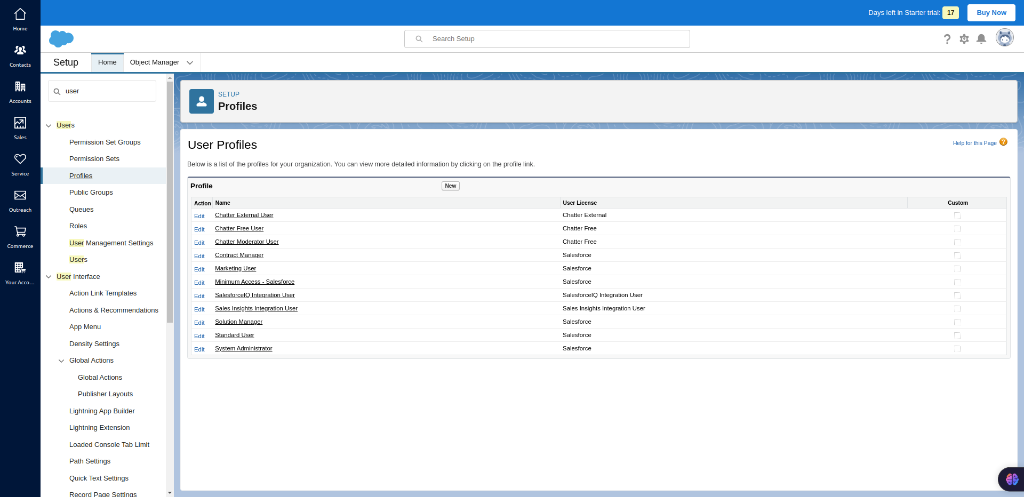
Enable SSO in Profile
In the “User Profile” select “edit” near the Standard User, and you will be redirected to the STANDARD USER EDIT page. In there enable the Is Single Sign-On Enabled to allow for the SSO for the standard users and then click the “save” to save the changes.